
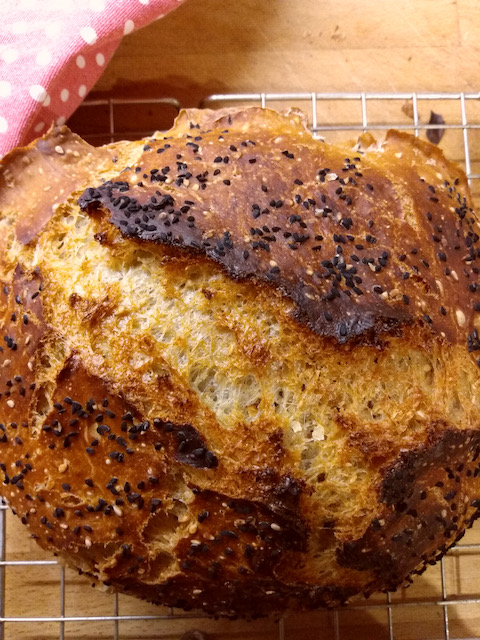
No Knead Bread
12th March 2022
There’s a certain something about the smell of freshly baked bread. It’s somehow evocative of a comforting, reassuring time when life was more simple, when we didn’t just make time to bake, we had time to bake. I smell the aroma of fresh bread and I instantly want to eat some!
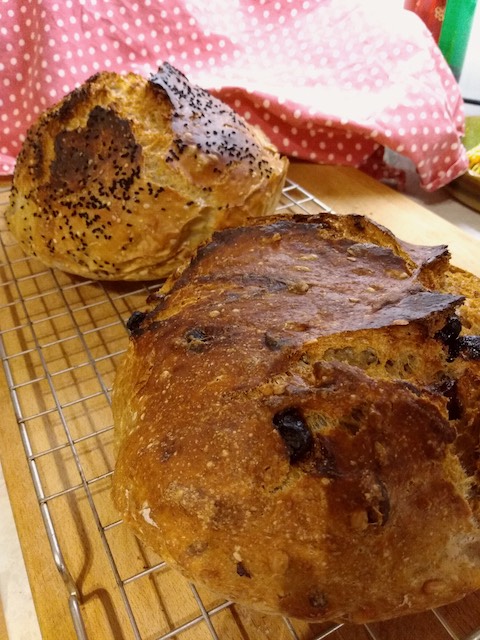
Kneading dough can be quite hard-going on already aching wrists so I was so pleased to come across ‘No Knead Bread”. There are many recipes out there, but here is mine with variations I’ve found to be reliable and delicious.
White Loaf
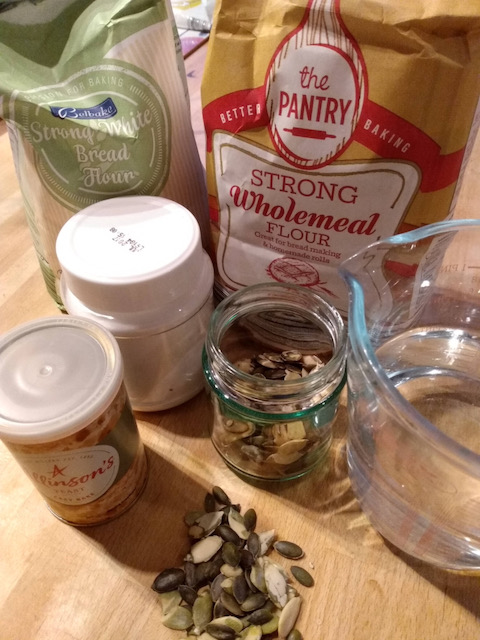
400g strong white bread flour
1/2 tsp dried fast-acting yeast
1 tsp salt
300ml tepid water
Wholemeal Loaf
100-200g strong wholemeal bread flour
strong white bread flour to make up to 400g — I find using more than half wholemeal to white makes the finished bread too dense.
1/2 tsp dried easy-bake yeast
1 tsp salt
300ml tepid water
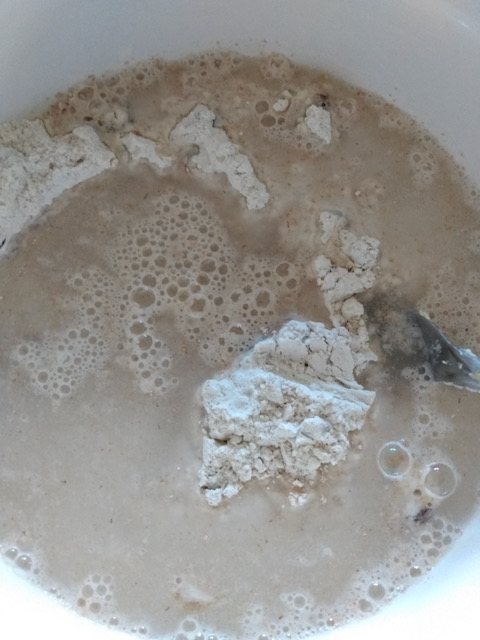
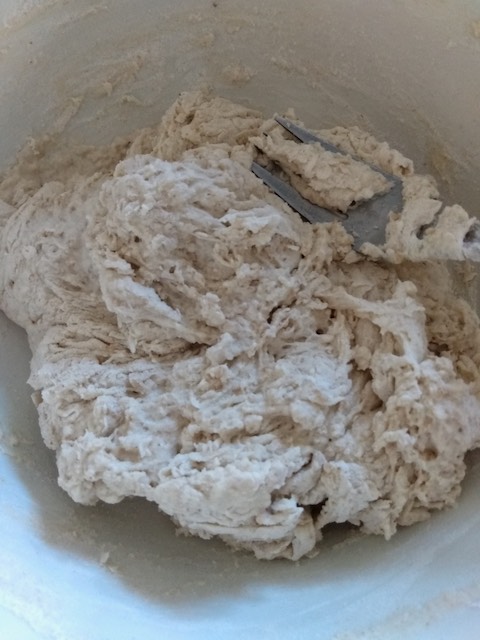
1. Mix the dry ingredients together in a large bowl with a balloon whisk. This saves having to sieve the flour.
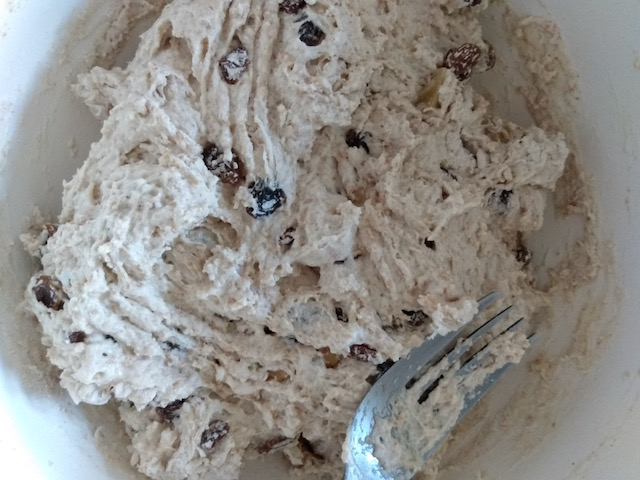
NOTE: At this stage you can add other ingredients. I often add some of the following:
Seeds: white sesame, black sesame, pumpkins, sunflower, pine nuts, dried black onion seeds, poppy seeds
Nuts: broken walnuts, pecans
Dried fruits: cranberries, blueberries, dates, goji berries
I add up to two handfuls in any combination, depending on what it is.
Spices: 2 tsps mixed spice, cinnamon, ginger
Herbs: tbsp chopped rosemary, thyme, sage
NOTE: It is important to add a little more water if you are adding things to the basic dough. Maybe up to even 40ml more. You want the dough to be soft but not sloppy.
2. Add the water and mix together with a fork.
3. Cover with a shower cap and put in a warm place for around 12-18 hours, depending on how warm it is. I sometimes mix to this stage before going to bed and bake first thing in the morning. Alternatively, I mix first thing in the morning and bake in the evening. It will seem to mix itself and rise beautifully during this time.
4. Heat your oven to gas mark 8. That’s HOT!!!
5. Place a casserole pot with a lid into the HOT oven. I use a pyrex dish. You can use anything ovenproof with a lid.
NOTE: I bake two loaves at a time to make the most use of fuel. You will need more bowls and lidded pots!
6. Start your timer. I set for 20 - 30 mins, depending on if I’m in a hurry or not and how warm the place where my bread is proving is located.
7. Place a sheet of greaseproof paper into a clean bowl or another pyrex dish.
8. Scrape the dough straight into the paper. Some recipes say it should be knocked back at this stage but I find this works so I don’t bother.
9. Cover again with the shower cap and place somewhere warm to rise again.
10. When your timer goes off, carefully remove the HOT dish and lid from the oven.
11. Lift the greasefproof paper with the dough in and place it into the hot dish. Cover with the lid and bake for 30 minutes.
NOTE: Don’t have too much paper hanging over the side of the pot. I did once let an overplapping piece catch fire in the oven, ooops!
12: After 30 minutes have elapsed, remove the HOT lid and continue to bake for another 15 minutes.
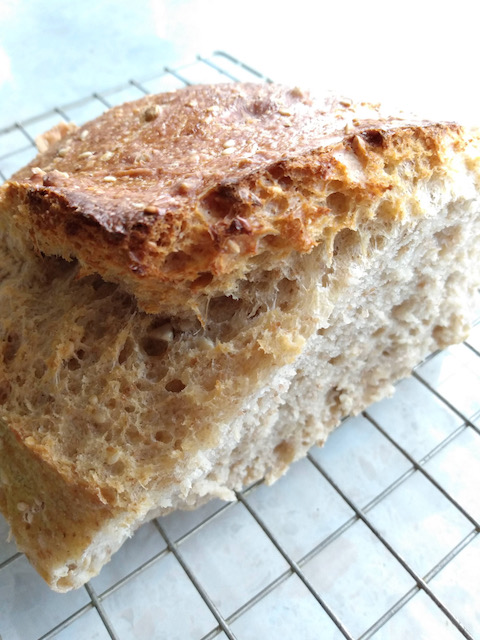
13. Remove the dish from the oven, tip the bread onto a cooking rack and peel off the paper. The loaf should sound hollow when tapped on the botton. If it needs a little longer just pop it back in the oven for 5 minutes.
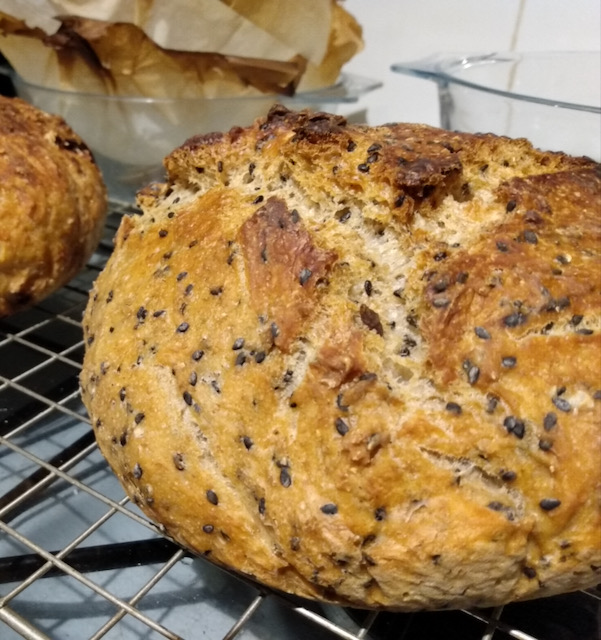
Try to resist cutting and eating the bread immediately! It will cut and taste better when warm but not hot.
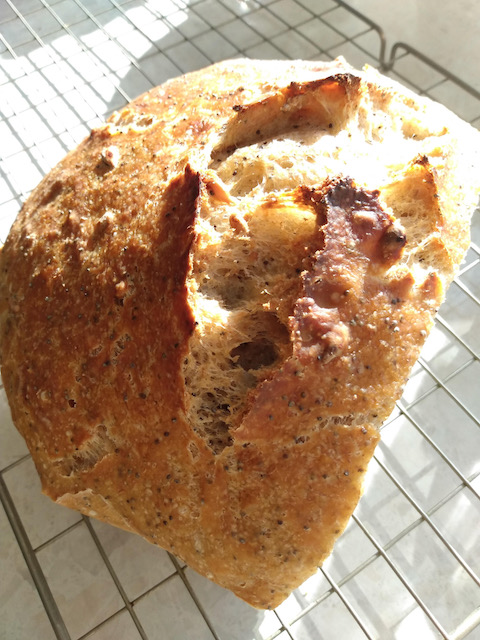
Savour every crumb!
xxxxxxxxxxxxxxxxxxxxxxxxxxxxxxxxxxxxxxxxxxxxxxxxxxxxxxxxxxxxxxxxxxxxxxxxx
If you want to read my posts as I publish them, please sign up to my newsletter. It’s easy and you can unsubscribe at any time. Thanks!
xxxxxxxxxxxxxxxxxxxxxxxxxxxxxxxxxxxxxxxxxxxxxxxxxxxxxxxxxxxxxxxxxxxxxxxxx
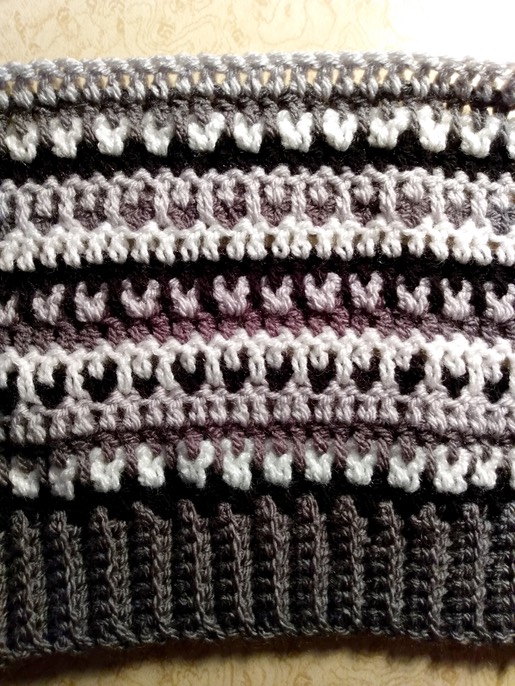
Monochrome Yuletide Acacia
16th March 2022
Rice pudding brulee; speaking to a large, attentive audience; swimming to those rocks and back. You know that feeling when you’ve experienced something and you just want to do it again straight away?
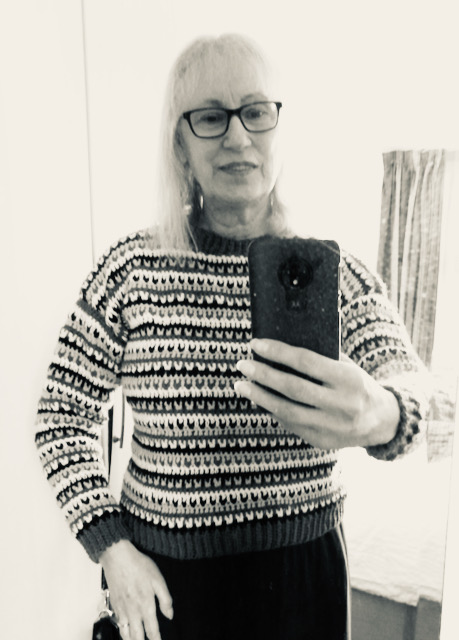
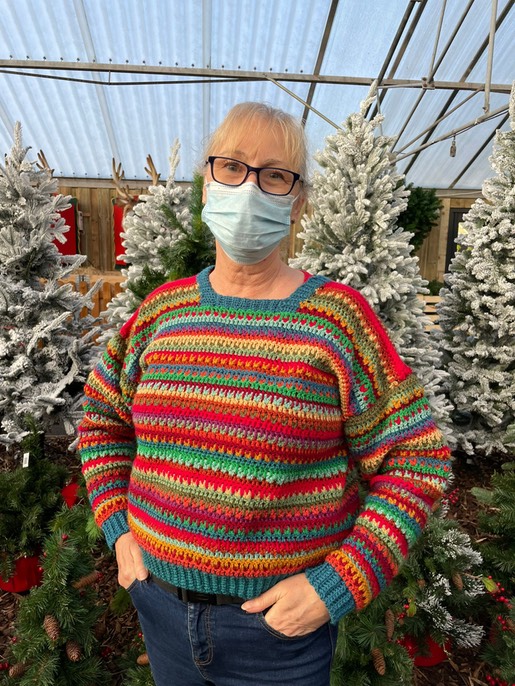
I finished my Christmas Yuletide Blanket/Acacia Sweater and immediately started the Monochrome version.
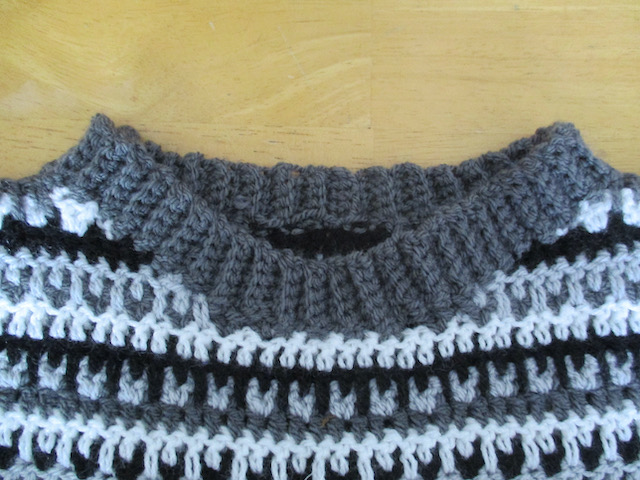
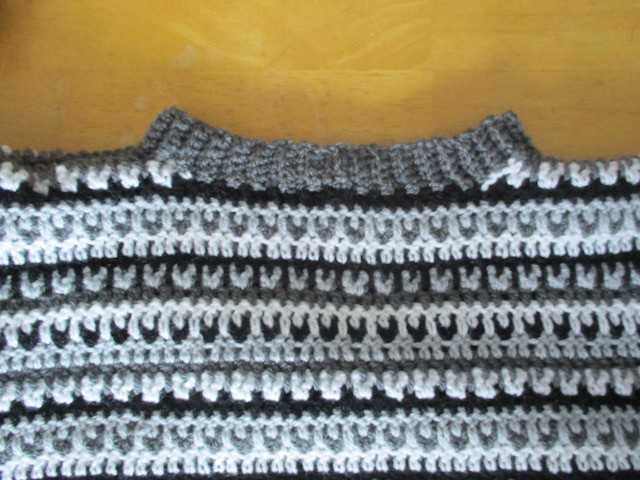
I made it a size down from the Christmas version to give a more fitted look and I decided on a rounder neck for this one.
Here are the details. Thank you for your patience if you’ve been waiting for these.
Use the Acacia Sweater pattern here, and the Yuletide Blanket stitch pattern here, throughout.
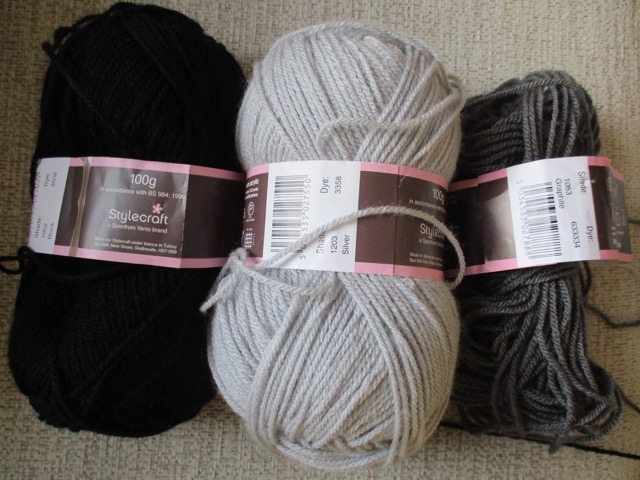
The yarns are:
Stylecraft Special DK - Black, Silver and Graphite,
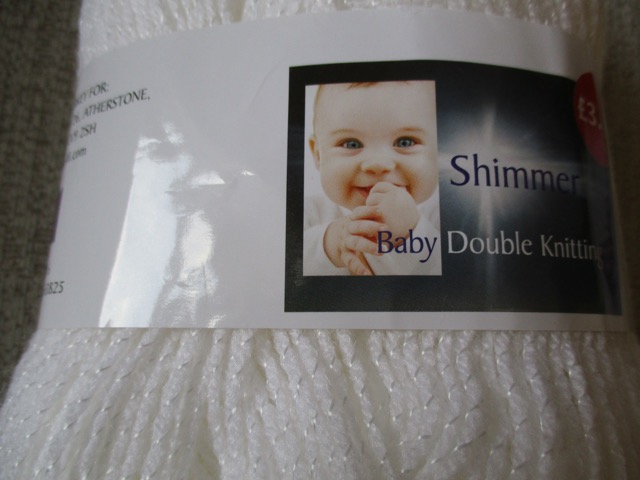
and Aldi Baby DK Shimmer.
When it came to the neck I shaped the neckline as follows.
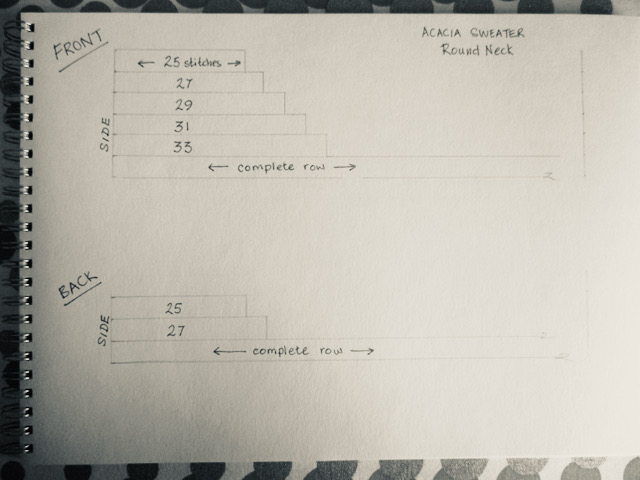
The ribbing for the neck was made as in the original instructions, but with 6 chain to start resulting in a rib of 5 stitches.
Caption tex
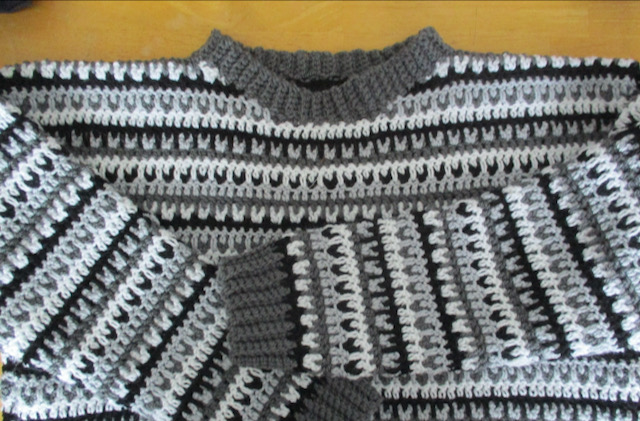
Measurements:
Centre Front to rib = 17”
Centre Back to rib = 18”
Centre Sleeve = 17.5"
With hindsight I’d have made the sleeves 2” longer and the body 1” longer. The original pattern is cropped and I did lengthen it for both versions, but I think the more fitted monochrome would look better a tad longer on me.
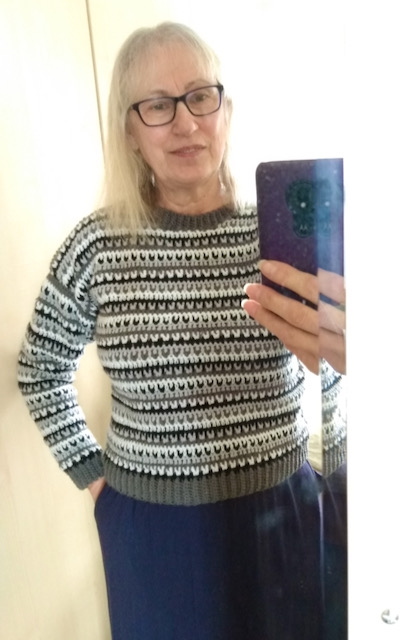
I really enjoyed making this. It’s an easy pattern and a lovely stitch pattern to get into. My thanks again to Lucy of Attic24 and Hooked on Tilly.
xxxxxxxxxxxxxxxxxxxxxxxxxxxxxxxxxxxxxxxxxxxxxxxxxxxxxxxxxxxxxxxxxxxxxxxxx
If you want to read my posts as I publish them, please sign up to my newsletter. It’s easy and you can unsubscribe at any time. Thanks!
xxxxxxxxxxxxxxxxxxxxxxxxxxxxxxxxxxxxxxxxxxxxxxxxxxxxxxxxxxxxxxxxxxxxxxxxx
Blooming Fantastic!
15th February 2022
Meet my new Brother! I still have my New Home (Janome), bought-to-sew-my-wedding-dress-33-years-ago machine, my workhorse, but a new machine was long overdue. I longed for automatic buttonholes! And now I have them and many other things besides.
After a lot of deliberating I chose the Brother Innov-is F480 embroidery and sewing machine. Here it is, set up to sew.
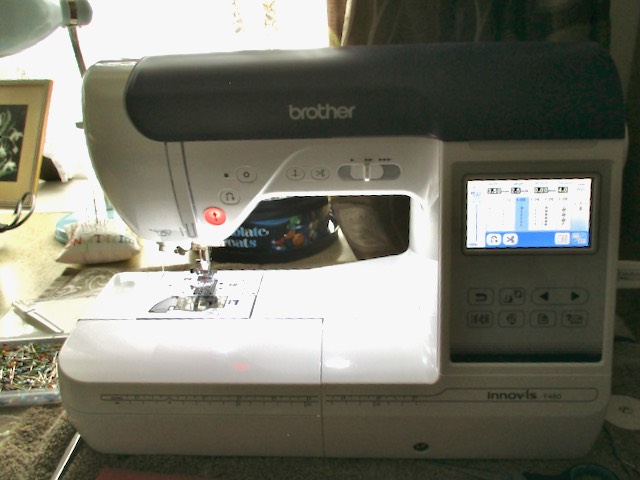
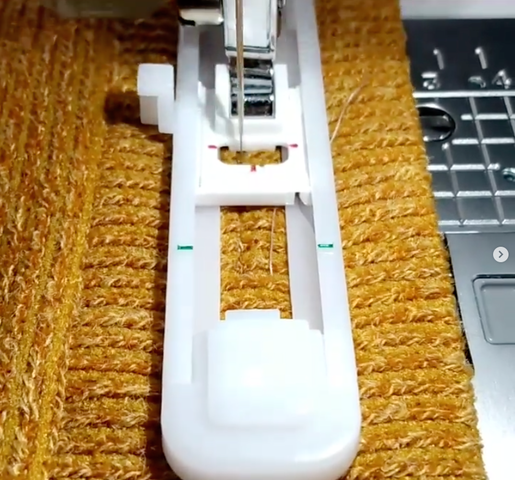
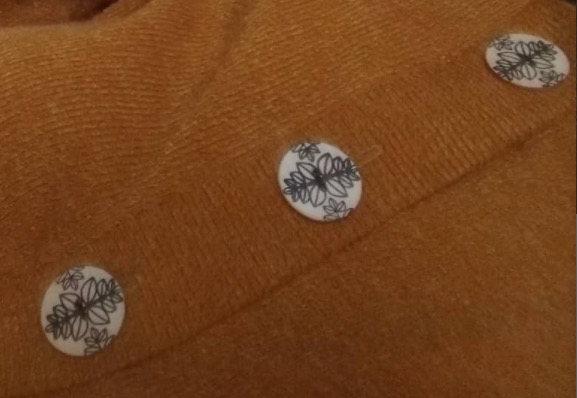
It came with more feet than I knew what to do with, but I’m slowly learning and experimenting. It sews superb buttonholes and I even used it to sew the buttons onto this Marlo Sweater.
The machine arrived last October so I spent November embroidering Christmas goodies. It’s very easy to set up and thread and gives excellent prompts. It also has a very clear and comprehensive manual.
I didn’t buy the software to embroider my own designs as it was about two thirds of the price of the machine! Instead, my first attempts were downloaded designs from the internet, and stock images and lettering already loaded in the machine. I found Urban Threads, Machine Embroidery Geek, and Embroidery Library good websites to start from, with modest prices. There are also many sites offering free embroidery designs. My limited experience tells me that some stitch out better than others and it’s wise to do a dummy run first.
The smiley Santas are on organic cotton and bamboo teatowels purchased from the Organic Textile Company.

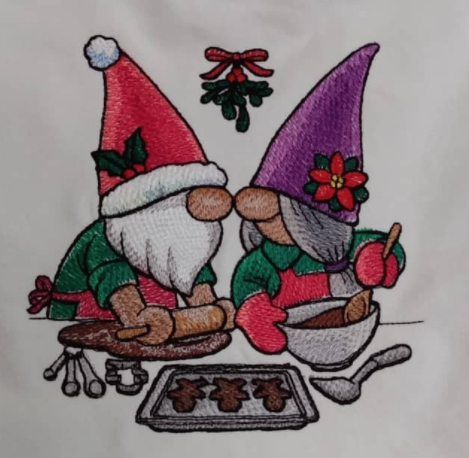
The gnomes are on an organic cotton apron from the same place.
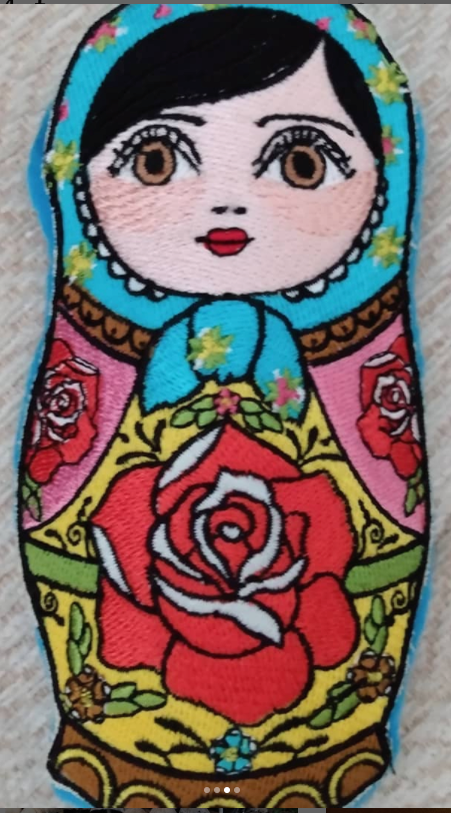
The matryoshka is actually a mini pocket that held two advent chocolates.
There were other designs but I gave them away before I photographed them! Oops!
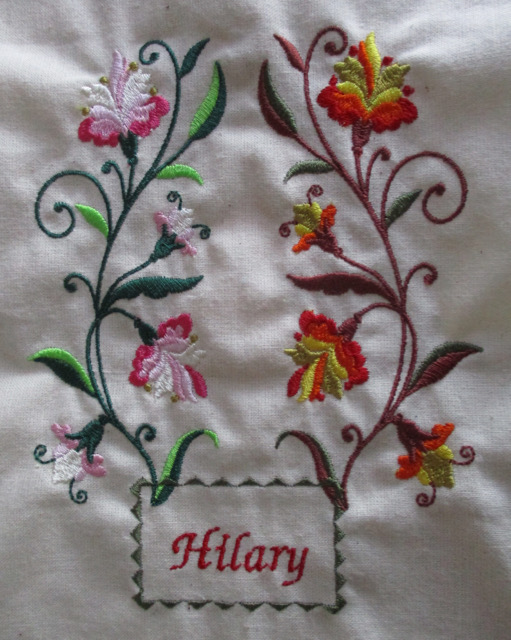
This design is preloaded into the machine. The one of the left uses threads as near as possible to those recommended. The one on the right is me trying out a different colourway.
I decided to revisit this a couple of weeks ago when I read the instagram post (11th Jan 2022) by @feistandflourish here. I’m currently retraining the right side of my brain to be less negative (after all that life generally and breast cancer in particular has thrown at it) by encouraging my left side to be super positive. Affirming statements really help!
And brilliantly, my DS found a free app that enables me to make my own designs! It’s called Inkscape and requires you to also download the extension Ink/Stitch to make your design into a pes file, ie, one that is readable by the Brother machine. I combined my lettering and the stock pattern together and voila!
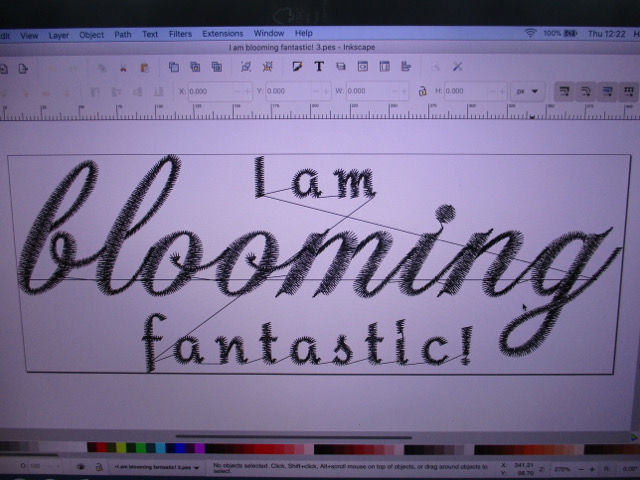
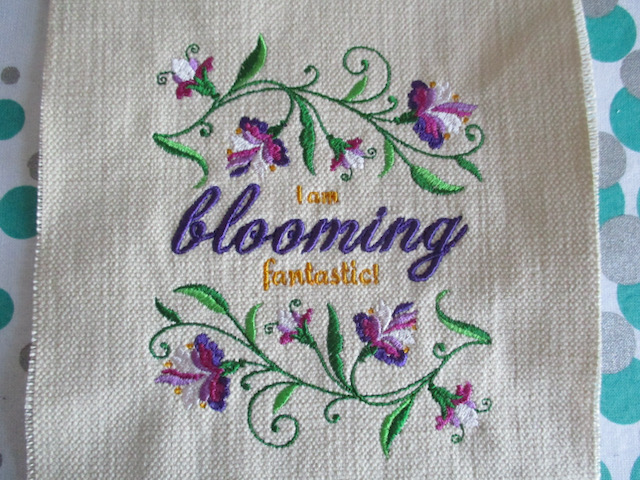
With the first attempt the 'I am fantastic’ was too pale when stitched in the golden yellow and the lettering was too closely spaced.

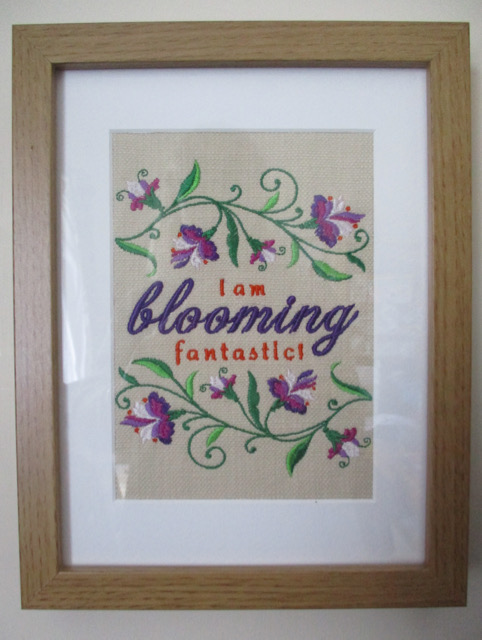
I restitched it in orange with better spacing and it’s now on my wall next to my computer, a constant reminder of being fantastic. Because God made me so. Positive. 👍😄
I’m very new to all this embroidery malarkey, but I hope you’ll enjoy reading about my journey. I’ve got so many designs in my head, haha!
Just a note - this is not an ad for Brother, nor am I getting paid nor any freebies for this post.
xxxxxxxxxxxxxxxxxxxxxxxxxxxxxxxxxxxxxxxxxxxxxxxxxxxxxxxxxxxxxxxxxxxxxxxxx
If you want to read my posts as I publish them, please sign up to my newsletter. It’s easy and you can unsubscribe at any time. Thanks!
xxxxxxxxxxxxxxxxxxxxxxxxxxxxxxxxxxxxxxxxxxxxxxxxxxxxxxxxxxxxxxxxxxxxxxxxx
Monochrome Yuletide/Acacia Jumper
29th January 2022
This monochrome version of the Yuletide/Acacia jumper is coming along apace now.
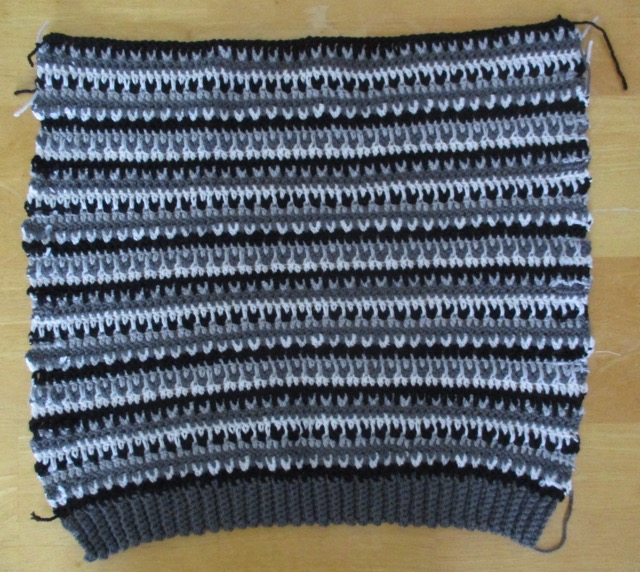
I’m really enjoying working with a resticted palette and it’s such a contrast to the one I made for Christmas. Memories of a lecture on colour during my Masters study have been flooding back - light against dark against light against dark...
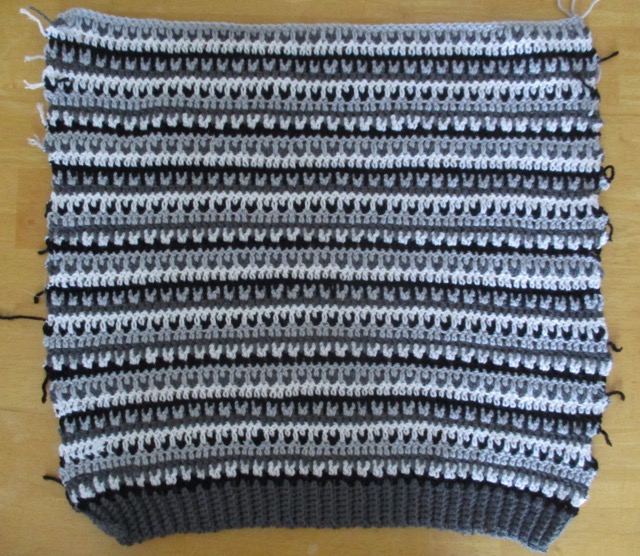
The two sides look very different and I’m going with the lighter side as the right side. I’d already decided this, but a poll on Instagram confirmed it! Thank you!
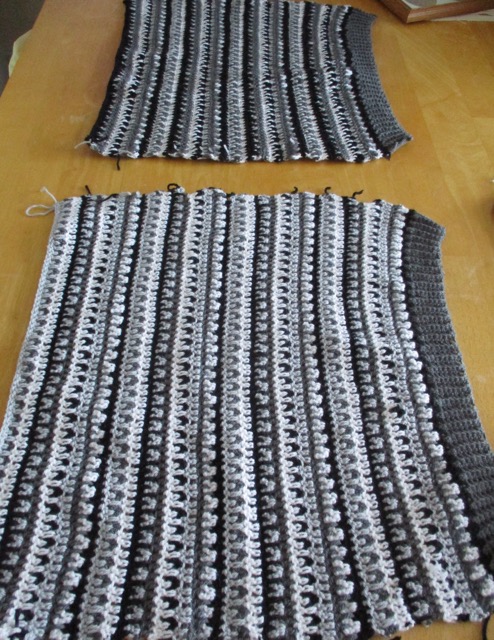
The two Acacia jumpers I’ve already made, here, had made-up-by-me squarish necklines but I think I’ll go round this time. I just need to work out the decreases.

I’m working both sleeves at the same time to avoid any differences that following the pattern whilst increasing might throw up.
The yarns are:
Stylecraft Special DK - Black, Silver and Graphite,
and Aldi Baby DK Shimmer - White, and I’m using size 4mm hook throughout.
My thanks again to Lucy at Attic24 and the unknown author of the Acacia Sweater pattern.
xxxxxxxxxxxxxxxxxxxxxxxxxxxxxxxxxxxxxxxxxxxxxxxxxxxxxxxxxxxxxxxxxxxxxx
If you want to read my posts as I publish them, please sign up to my newsletter. It’s easy and you can unsubscribe at any time. Thanks!
Home and Away
14th January 2022
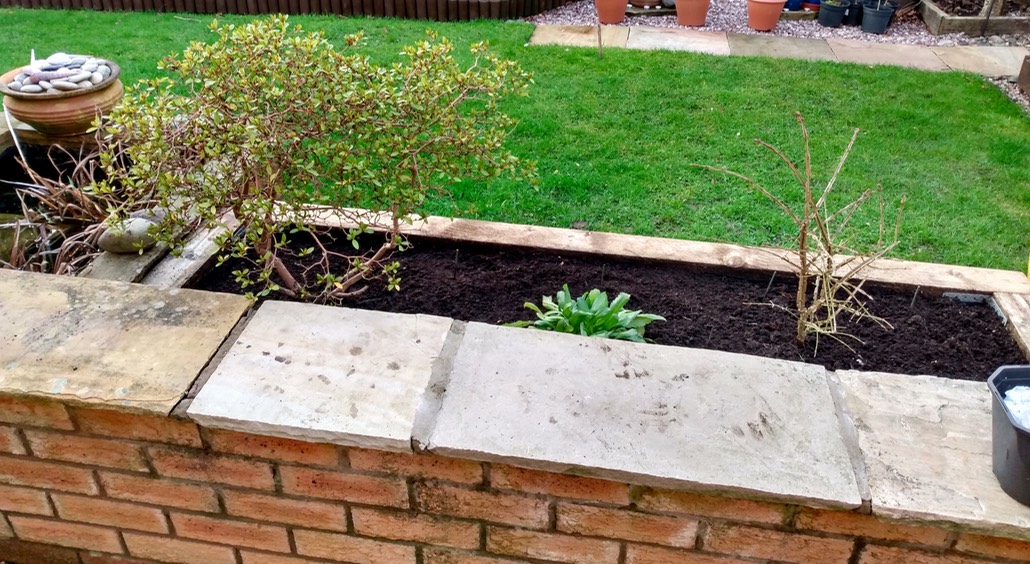
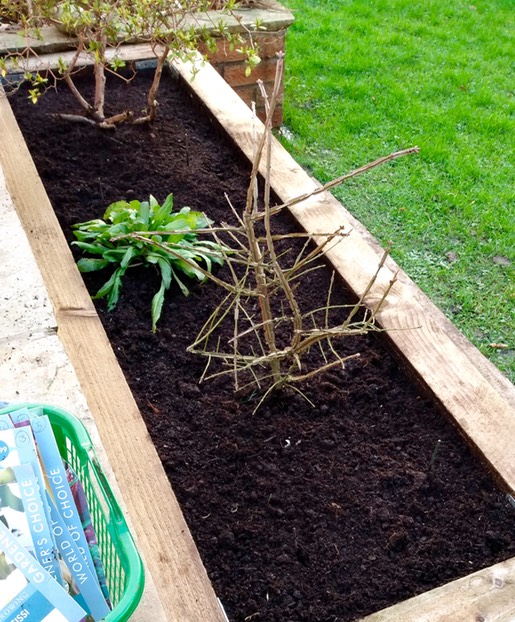
We have a moat! And a new raised bed! DH had been saving some hefty pieces of wood (gifted to us) for a rainy day, but he didn’t have the means to cut them. He borrowed a friend’s chainsaw and the necessary PPE (thank you very much) and a couple of hours later our new bed was installed.
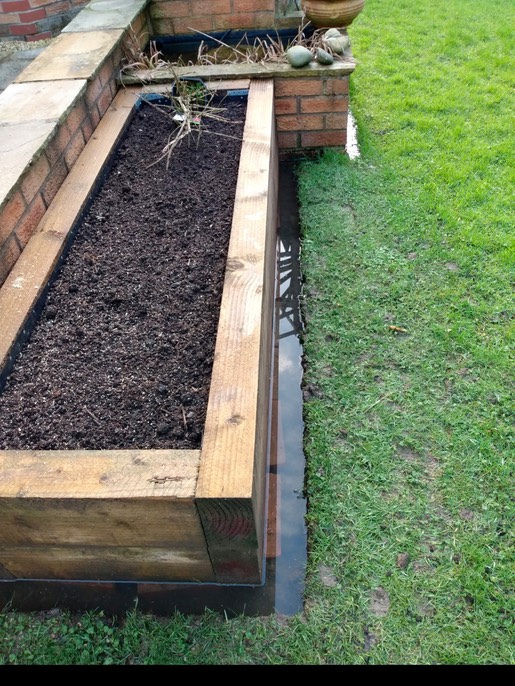
We’ve had so much rain that the water is level with the lawn. Bog plants were beginning to take over in this part of the garden. I’d always envisged plants growing there, but different sorts, and a raised bed was the only solution to give them a fighting chance. A foundation layer of loose bricks was laid down to put the beams on and the moat will be filled with gravel at some point, but we couldnt wait to plant it up.
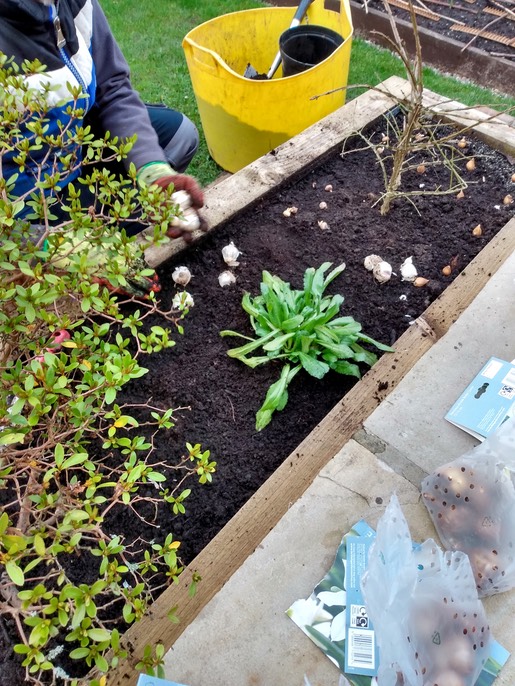
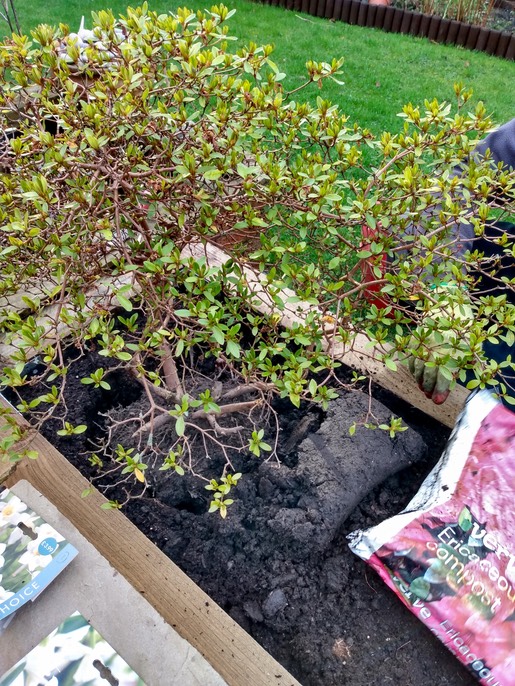
A relocated azalea, a leucanthemum grown from a tiny plug, a newly purchased euonymous, and lots of spring and summer bulbs are now nestled in.
A full bag of ericaceous compost has been added to the azalea end, just to make it feel especially at home, and we’re hoping we havent been too late planting the bulbs. At some point, we think we might have to lay a drain under the lawn to take the excess water to a lower area, but not just yet.
Another thing safely installed is the pine corner cupboard we bought from our local hospice warehouse this week.
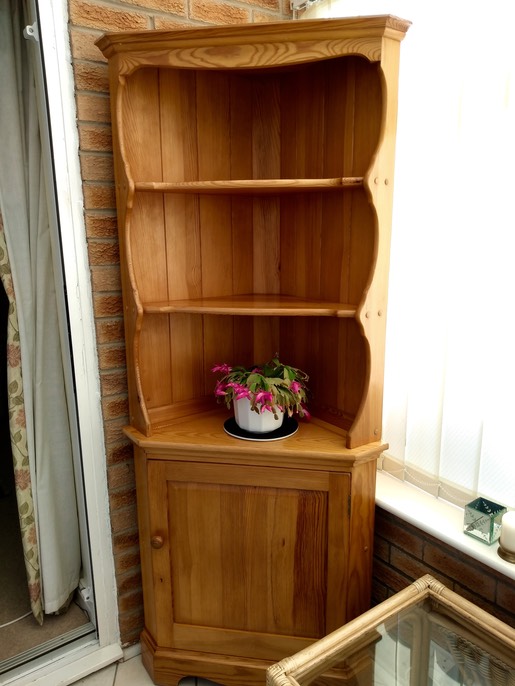
I had been looking for ages for something that would fit into the conservatory and had a cupboard big enough to store some of my larger dyeing equipment in. I know pine isn’t ‘on-trend’ but as someone who doesn’t set much store by that, I think it’s perfect! It ticks all the boxes: right size and shape, big enough without being massive, colour goes well with the existing conservatory furniture, and it’s second hand! Nothing goes to landfill and St Luke’s Hospice gets some dosh towards the amazing work it does. It’s a place that has touched so many lives in our town and where I had complimentary reflexology after my radiotherapy for breast cancer.
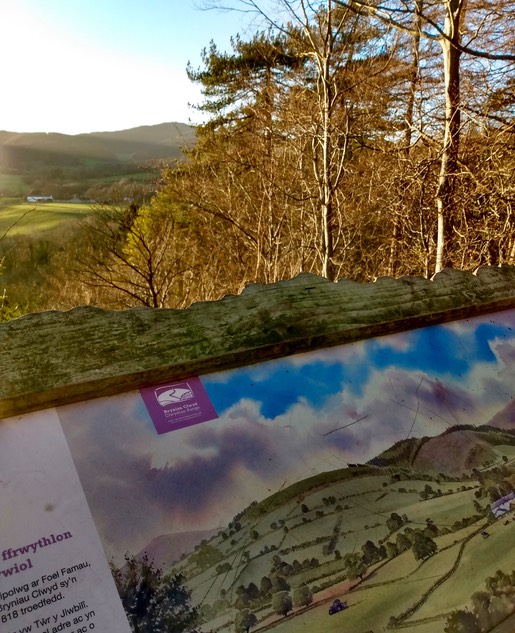
Further afield, we had a lovely few hours in Loggerheads Country Park on one of the sparkling, crisp, blue days that January sometimes offers up.


The light in the valley made some photos I took look almost black and white but gave a wonderfully moody atmosphere to an industrial riverbank slowly being reclaimed by nature.
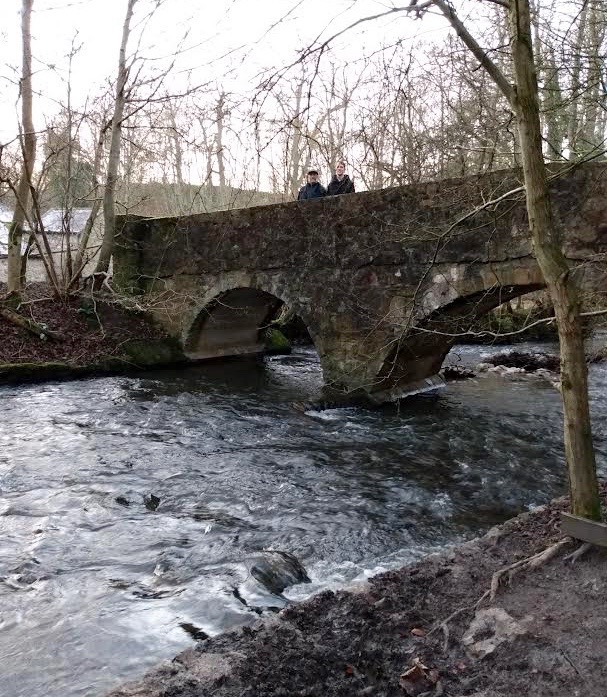

Up on the top of the limestone ridge it was a different story as we walked in the golden hour, watching the sun slip down behind the Clwydian Mountains of North Wales.

We came across several Wishing Trees, where coins had been pressed into felled or fallen trunks, or tree stumps.
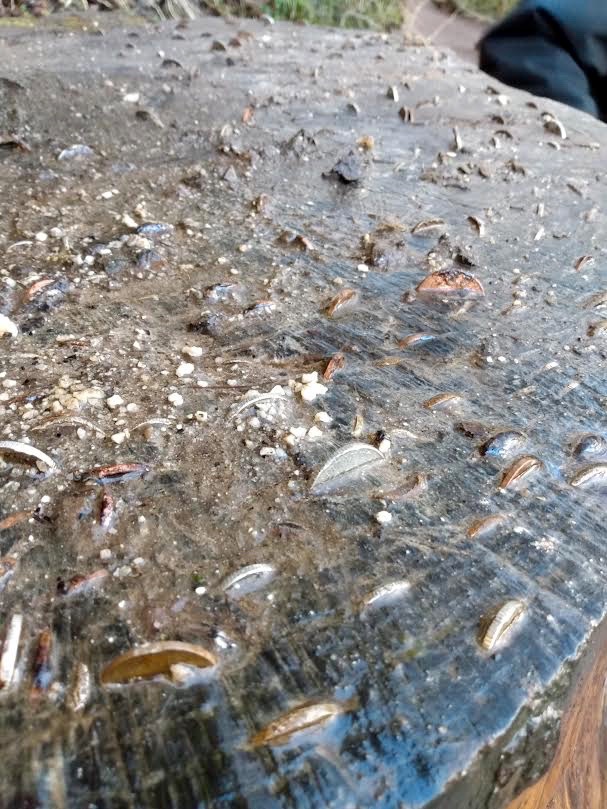
This practice dates back to the 1700s and, although it died out for a while, it has seen a revival in recent times. Pressing a coin in was thought to rid people of their illnesses whilst taking a coin out would give them the illness. Sadly, in some places coins are being pressed into living wood and the trees are suffering as a result. Something that should stop, as we really need our trees!
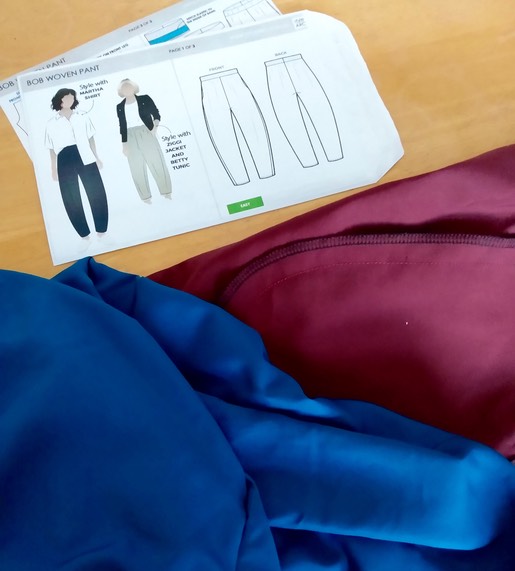
Not much to show from the studio but the new monochrome jumper is coming on apace, a wearable toile of Style Arc’s Bob Pants is mostly completed and a second pair begun. More to be revealed in the next post.
Oh, and a secret embroidery project that can’t be shared as it’s to be a gift!
Keep smiling, stay well, keep growing, walking, and creating!
xxxxxxxxxxxxxxxxxxxxxxxxxxxxxxxxxxxxxxxxxxxxxxxxxxxxxxxxxxxxxxxxxxxxxx
If you want to read my posts as I publish them, please sign up to my newsletter. It’s easy and you can unsubscribe at any time. Thanks!
Yuletide Jumper / Acacia Sweater
6th January 2022
Hello again! 2021 turned out to be the year I didn’t blog! My makes and allotment news went straight to Instagram, and then, not always. It was a funny old year for me and I’m guessing for you too.

So, here’s to blogging again, recording my makes, my gardening, and whatever else I think needs a word and picture or two.
Back in autumn 2020 I crocheted this jumper in King Cole Riot yarn, colourway: Chameleon. I’d downloaded and printed off the pattern eons ago and neglected to put a reference on it.

Then in November 2021 I saw Attic24’s Yuletide Blanket and thought it would work up beautifully, using this pattern, as a Christmas jumper. So many people have asked what the pattern is, so after much searching, I can reveal it is the Acacia Sweater (below) by Hooked on Tilly.
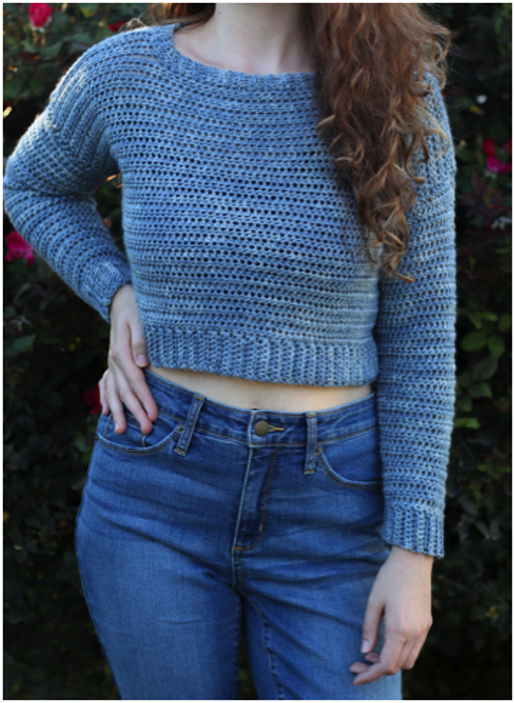
It was a free pattern and I think I downloaded it from Ravelry. Alas, I can’t find it again, nor any live links to Hooked on Tilly.
As this was a free pattern initially, I'm publishing it here and giving full credit to the designer. Full credit to Lucy at Attic24 for the colour choices and sequence for the Yuletide Blanket.
The Yuletide Blanket calls for 12 colours of Stylecraft Special DK. I have a lot of this in my stash! But there were four colours I didn’t have so I made substitutions. Here is my colour list.
Plum (instead of Burgundy)
Tomato
Copper (instead of Gingerbread)
Khaki (instead of Bottle)
Claret
Gold
Cypress
Petrol (instead of Teal)
Lipstick
Camel
Sage
Kelly Green

I followed the Attic24 colour sequence.
Also, I didn’t fancy the boatneck, so I did what I did last time - I made up the neck as I went along, ending up with a square-ish neckline.
NOTE: The pattern is written with US notation for stitches.
NOTE: I used a 4mm hook throughout.
NOTE: I used Stylecraft Special DK throughout.
NOTE: I made mine longer.
Here’s the pattern, as first published.
Acacia cropped sweater
Materials:
5.50mm Crochet Hook
Approx. 850-1,300 yards medium weight (4) yarn
Scissors
Yarn Needle
Notes:
Sweater is worked in 4 separate panels. Neck ribbing is done last.
Size adjustments are listed as such (XS, S, M, L, XL, 2XL)
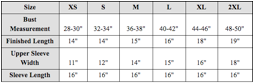
Gauge:
Using a 5.50mm Crochet Hook
16 Half Double Crochet Stitches = 4”
12 Half Double Crochet Rows = 4”
Abbreviations: US notation
Ch - Chain
SC - Single Crochet
SC BLO - Single Crochet
HDC - Half Double Crochet
HDC INC - 2 HDC into One Stitch (Increase)
Pattern:
Front & Back Panel (Make Two):
Band -
Ch9
R1 - Turn, SC into the 2nd Ch from the hook and across (8)
R2 - Ch1, Turn, SC BLO across (8)
Repeat Row 2 for a total of (62, 70, 78, 86, 94, 102) Rows
Continue to body.
Body -
Note: We will now be working along the top of the band.
R1 - Ch1, Turn, SC into each row across the band (62, 70, 78, 86, 94, 102)
R2 - Ch1, Turn, HDC across (62, 70, 78, 86, 94, 102)
Repeat Row 2 for a total of (36, 36, 40, 42, 48, 52) Rows.
Continue to shoulders.
Shoulders -
R(37, 37, 41, 43, 49, 53) - Ch1, Turn, HDC into the next (18, 22, 26, 29, 31, 35) Stitches.
R(38, 38, 42, 44, 50, 54) - Ch1, Turn, HDC back across (18, 22, 26, 29, 31, 35)
Repeat row (38, 38, 42, 44, 50, 54) two more times.
Fasten off.
Attach yarn on the other end of your work, without the shoulder portion, (18, 22, 26, 29, 31, 35) Stitches in from the edge.
Note: The first row will be worked from the attached stitch to the edge.
R(37, 37, 41, 43, 49, 53) - Ch1, Turn, HDC into the next (18, 22, 26, 29, 31, 35) Stitches.
R(38, 38, 42, 44, 50, 54) - Ch1, Turn, HDC back across (18, 22, 26, 29, 31, 35)
Repeat row (38, 38, 42, 44, 50, 54) two more times.
Fasten off.
Sleeves (Make Two) -
Note: Sleeves are worked from the cuff up to the widest point.
Cuff Band -
Ch9
R1 - Turn, SC into the 2nd Ch from the hook and across (8)
R2 - Ch1, Turn, SC BLO across (8)
Repeat Row 2 for a total of (32, 32, 32, 32, 36, 36) Rows
Continue to Sleeve.
Sleeve -
Note: We will now be working along the top of the band.
R1 - Ch1, Turn, SC into each row across the band (32, 32, 32, 32, 36, 36)
R2 - Ch1, Turn, HDC across (32, 32, 32, 32, 36, 36)
R3 - Ch1, Turn, HDC INC, HDC across until one stitch remains, HDC INC (34, 34, 34, 34, 38, 38)
Notes:
1. Between increases repeated Row 2.
2. Each increase row should increase by 2 Stitches)
Repeat row 3 (The Increasing Row) -
XS - Every 7th Row ending with 4 HDC rows for a total of 42 Rows.
S - Every 5th Row ending with 4 Rows HDC for a total of 42 Rows.
M - Every 3rd Row ending with 6 Rows HDC for a total of 42 Rows.
L - Every 3rd Row ending with 3 Rows HDC for a total of 42 Rows.
XL - Every 3rd Row for a total of 42 Rows.
2XL - Every 2nd Row ending with 5 Rows HDC for a total of 42 Rows.
Fasten off.
Seaming -
Step 1 - Seam shoulder portions of each panel together.
Step 2 - Seam Sleeves perpendicular to each
shoulder.
Step 3 - Seam from the band up to the cuff.
Neckline -
Attach yarn stitch along the back of the neckline.
Ribbing:
Ch5
R1 - SC into 2nd Ch from hook and across, Sl St into next 2 Sts (4)
R2 - Turn, SC BLO into single crochet stitches (4)
R3 - Ch1, Turn, SC BLO across, SL St into next 2 Sts (4)
Repeat rows 2 & 3 all the way around the neckline. Slip Stitch last row to the first row.
Fasten off, weave in ends.
And that’s it!

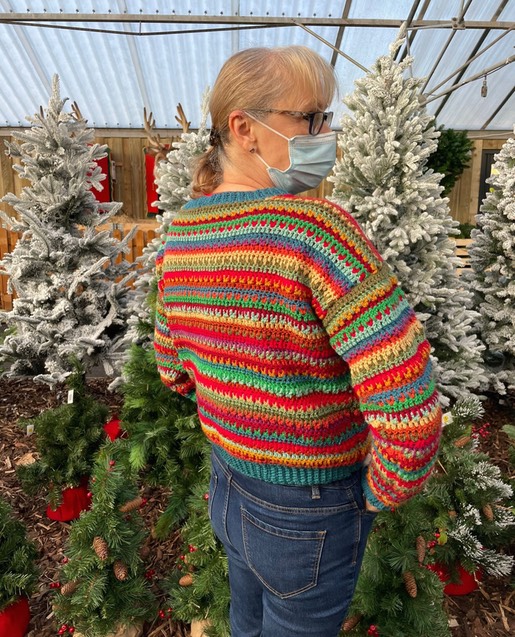
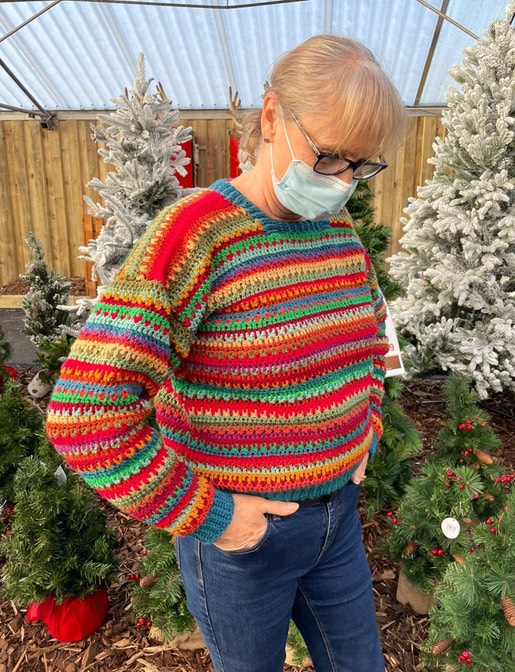
I’m really happy with the way it turned out. Although I made the same size as previously, it came out roomier than the one in King Cole Riot. Not a bad thing for a winter jumper, as it’s easy to fit over t-shirts and long sleeved tops. It’s very cosy! That said, I’ve started another, a size smaller, in monochrome tones using Black, Graphite and Silver Stylecraft Special DK, and white with a lustrous, silky-looking thread running through it which I bought years ago in an Aldi supermarket.
It’s always good to have a project on the go! ;))
xxxxxxxxxxxxxxxxxxxxxxxxxxxxxxxxxxxxxxxxxxxxxxxxxxxxxxxxxxxxxxxxxxxxxx
If you want to read my posts as I publish them, please sign up to my newsletter. It’s easy and you can unsubscribe at any time. Thanks!
2021 - The Year of the Stash
8th February 2021
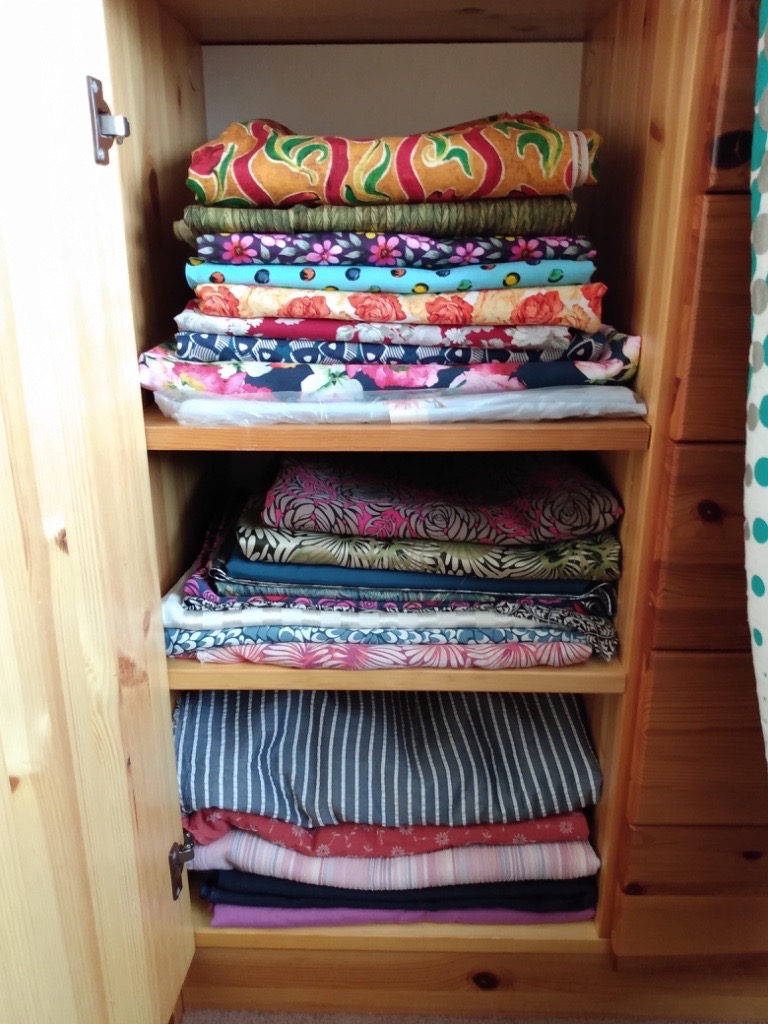
I have a new sewing room, yay! Moving my sewing/workspace into a larger bedroom has given me the opportunity to take a long, hard look at my stash. Yes, I have A LOT of fabric.
There are a few yards/metres of what-was-I-thinking, some is of a fibre I wouldn’t necessarily buy nowadays, and some has been gifted to me. Mostly its fabric I love and have plans for. So why do I look to buy more when I find a pattern I like? Disorganised? Lazy? It’s not the perfect fabric? Who knows.
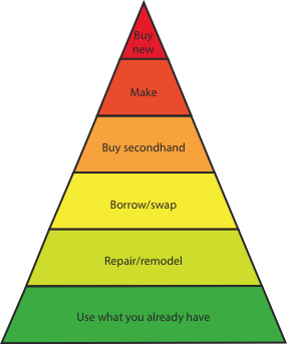
I’ve decided this will be the year when I SHOP MY STASH. Why? Because...
1. I have lots of fabric, perfect or not.
2. I can now see what I have. Organised, or what?! Just a sample. You understand, I know.
3. Covid19 has stopped me browsing the fabric shops irl.
4. I like to feel fabric before buying, so online shopping has it’s limitations.
5. I want to make more purposefully.
6. It’s cheaper. Ker-ching!
7. Last but not least, I don’t need to. I don’t need to buy more of anything when I have plenty already. It messes with my ethics gene.
While the meds I'm taking are doing a good job keeping me cancer-free, the side effects have meant I‘ve been unable to sew like I used to. I get joint aches and pains, so it’s more important than ever that I sew what I like and will wear. I’m still learning the lesson here as to what I like and what suits me. Yes, even at my tender age.
Not being able to pop to the haberdashers meant I sewed a little experimentally/ more imaginatively last year, which was all to the good. So here’s to a diverse and diverting year of sewing ahead.
I’ve made a start by diving into the LBPULLOVER pool. Find it here. I dithered about buying this pattern for ages. That NECK! I really wasn’t sure. I’ve made two so far this year and they won’t be the last. I love them! (Not a sponsored review.)
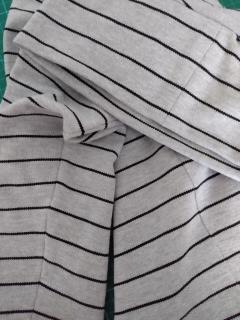
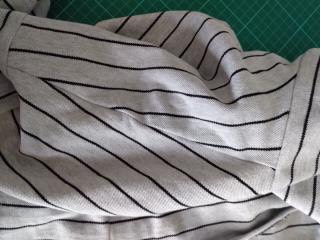
The first is in sweatshirting that my DD gifted to me.
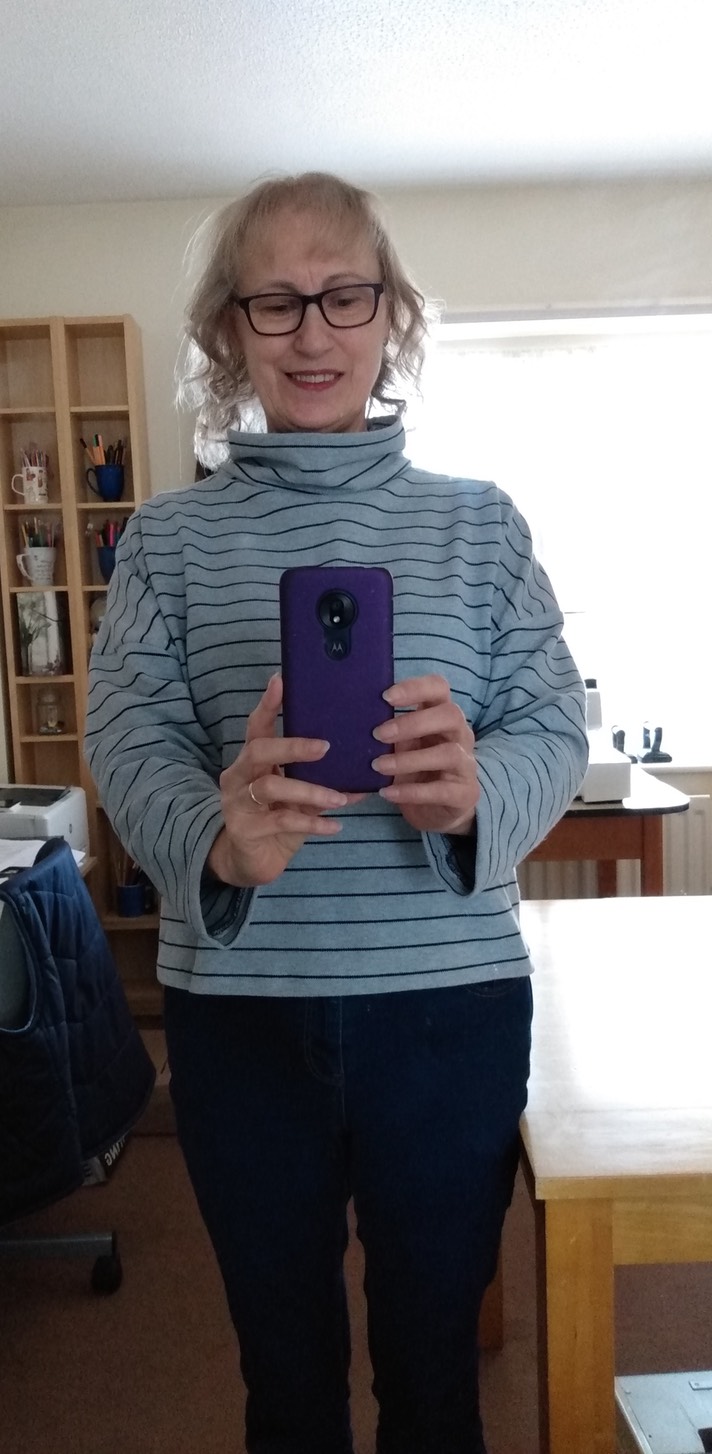
Very happy with pattern matching the sides, sleeves and neck. Not so good on the shoulders. I’ll pay more attention next time.
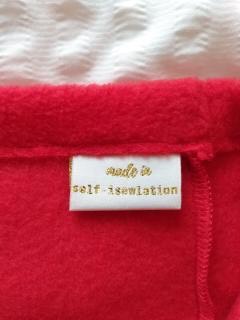
The second is in polyester fleece. I’ve had this in my stash for years. I probably wouldn’t buy it today, it being polyester and all, but I thought it’s probably better in my wardrobe than in my stash. What should we do with fabric we have that’s not so ‘green’? It’s made a perfect lbpullover, so warm and cosy. I added two inches to the sleeves and length. My machine hated it so I sewed most it on my overlocker, which worked well.


Label is available from modistasewing.com here. (Non sponsored.)
Here’s to making the most of where we are and what we have. It might not be perfect but it’s pretty good in the big scheme of things.
xxxxxxxxxxxxxxxxxxxxxxxxxxxxxxxxxxxxxxxxxxxxxxxxxxxxxxxxxxxxxxxxxxxxxx
If you want to read my posts as I publish them, please sign up to my newsletter. It’s easy and you can unsubscribe at any time. Thanks!
I’m back! With biscuits!
24th May 2020
Well, it’s been a while!
Last year was to be the year I took up the reins after completing my Masters degree and got down to being proper arty in my career. Alas, it was not to be.
I found I was overwhelmed by many factors all arriving at the same time - the end of my research creative practice, the end of my job in the university library, the start of almost-getting-near-to-semi-retirement, empty nest, BREXIT, and then a breast cancer diagnosis. And now, coronavirus.
I‘ve felt very up and down. I’m sure many of you will have felt the same for lots of different reasons. Suffice to say, I’m now on an upward slope and to prove it here’s my first post in absolutely ages. I’m keeping it simple.
I’ve been asked for this recipe many times, so here it is. I copied it from the internet eons ago and all credit goes to Twink, whoever you may be.
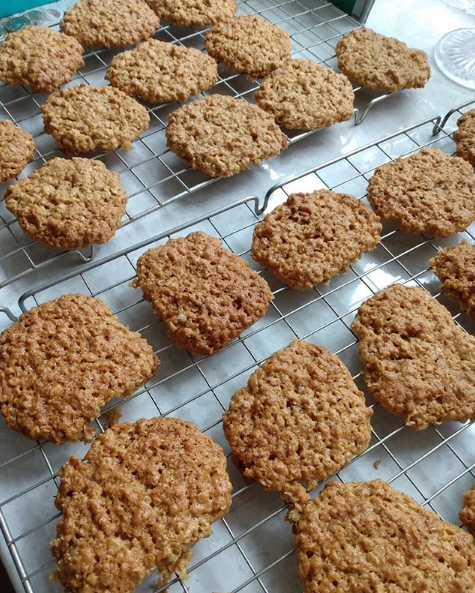
Twink’s Hobnob Recipe
Ingredients
8oz sr flour
8oz sugar
8oz porridge oats8oz margarine
1tbsp golden syrup
1tbsp hot water1/2 tsp bicarbonate of soda
Instructions
· Mix the flour, oats and sugar.
· Melt margarine, syrup and water in a pan.
· Stir in bicarbonate of soda.
· Add to dry mix.
· Mix well and make into smallish balls which you then put on a greased tray and flatten slightly with a fork.
· Put in the oven at 180 degrees C, Gas Mark 4, for 15 mins and cool on the tray.
The aim is to get them golden in the oven, not brown.
xxxxxxxxxxxxxxxxxxxxxxxxxxxxxxxxxxxxxxxxxxxxxxxxxxxxxxxxxxxxxxxxxxxxxx
If you want to read my posts as I publish them, please sign up to my newsletter. It’s easy and you can unsubscribe at any time. Thanks!
Burial Coverings - Part 1: The Sleeping Bag
19th March 2019
February, with its unseasonal flash of heat, has come and gone and now we’re into a wild and stormy March. The intensity of my MA studies has also disappeared and has been replaced by catching up on all the things that were put aside during my degree. There’s been a lot of tidying up!
It’s been hard to adjust to not having a deadline to meet but, with perfect timing, I have had time to meet family needs. For myself, I’m feeding the need to sew, making some clothes for myself from fabric that’s been in my stash for way too long. The simple discipline of following pattern instructions has been therapeutic and calming in a world of feeling a little adrift, after the purposeful voyage of university life.
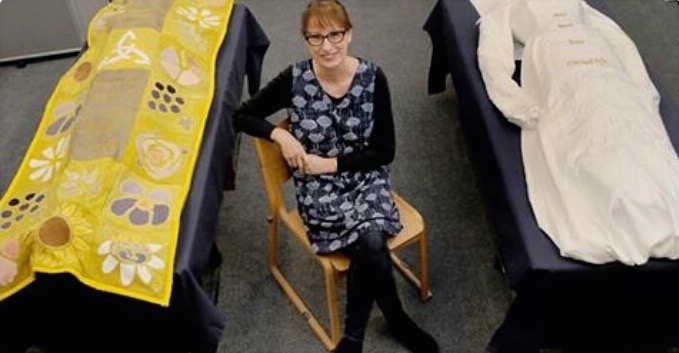
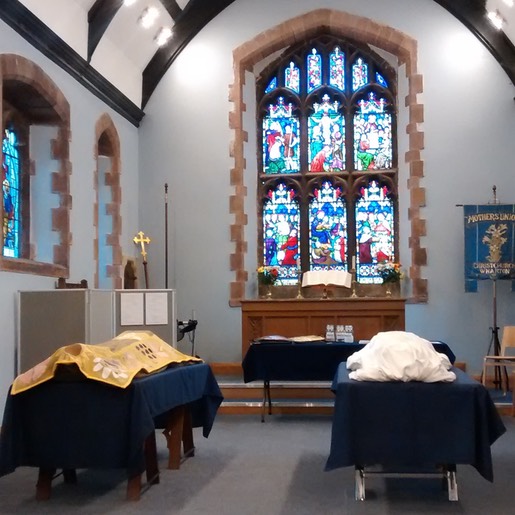
Many of you have asked about my final pieces for my Masters degree, so here at last is a summing up. I made two pieces, burial coverings for a Christian woman’s funeral, that could be used instead of a coffin. One is a colourful sleeping bag, dyed with natural, plant-based dyes. The other is a gown, based loosely on my own wedding dress, to represent a Christian bride going to meet her bridegroom, Jesus. If you’d told me at the beginning of my course that’s what I’d be making I would not have believed you! But, this is the path I went along and I am very happy with the outcome. The works were entitled, No Fear in Death.
Using dyes at university which required me to ‘suit up’, with a mask, apron, gloves and working under an extractor fan because of toxins, made me look at alternative, kinder, safer ways to colour cloth. It was a steep learning curve, as I knew absolutely nothing about this area! You can read about this in my previous posts here and here.
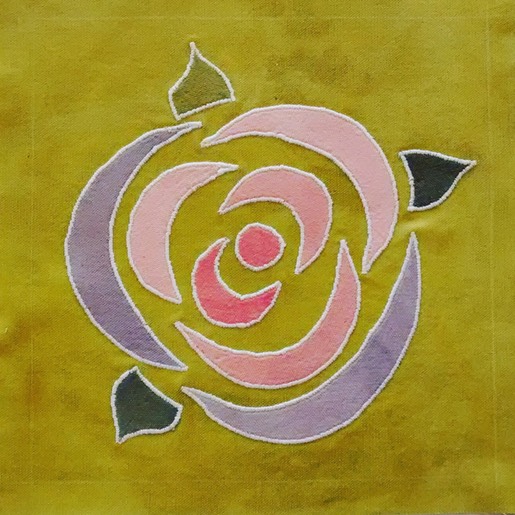
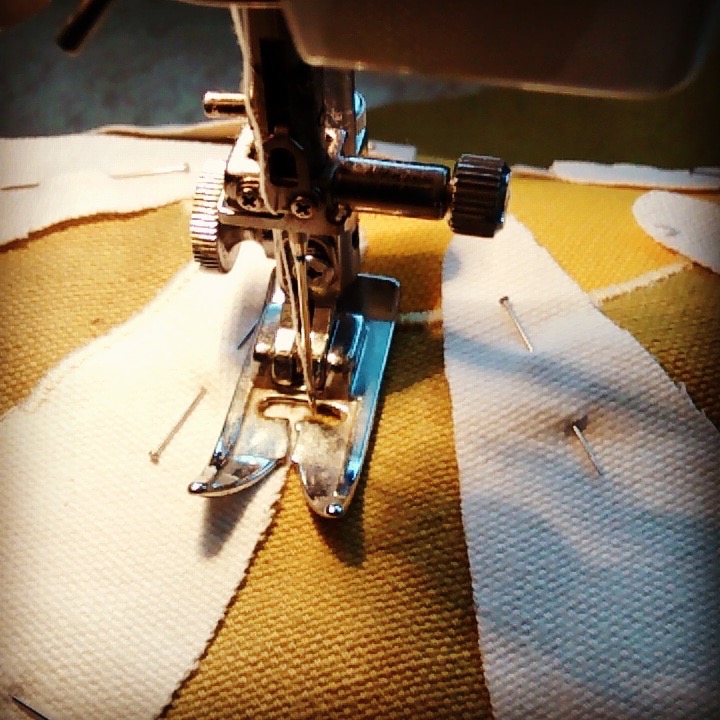
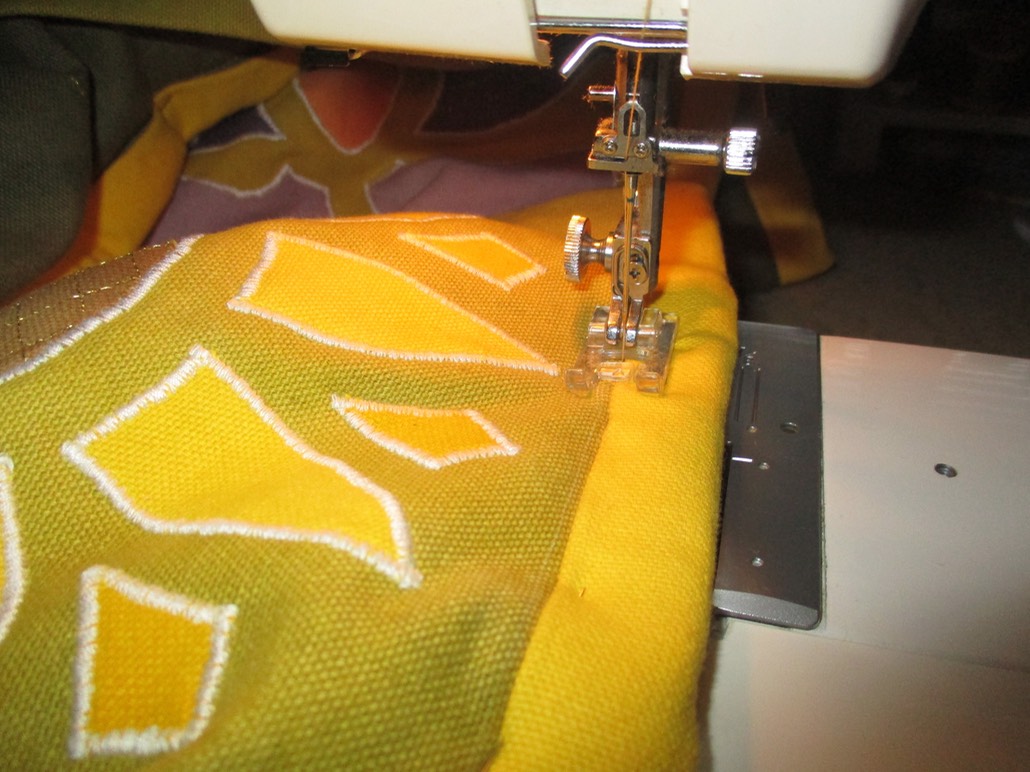
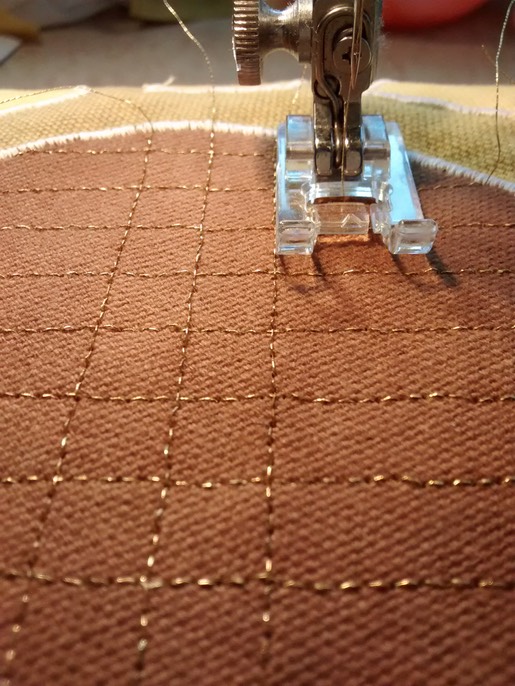
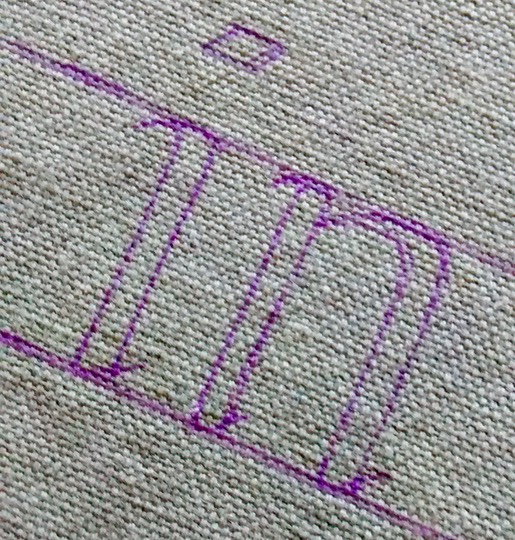
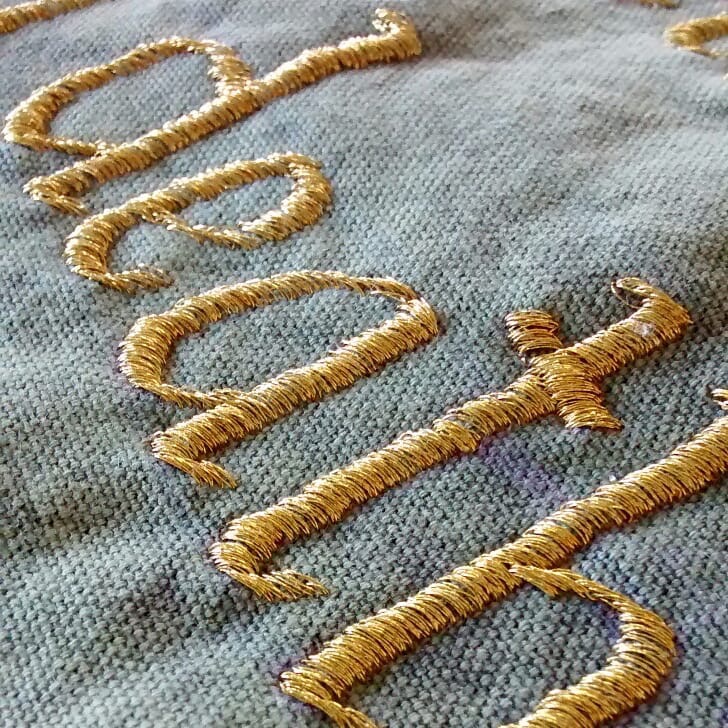
Once I had my colours, the next stage was designing the covering. I opted for a sleeping bag because it is a practical, one-size-fits-all shape that has conotations of rest and cosiness. I made the top a patchwork of appliqued squares which was practical to work with and conjoured up a traditional, ancient craft, born of thriftiness. Inspired, as always, by stained glass windows and Greek icons I used gold thread to sew ‘glazing bars’ across the joins.
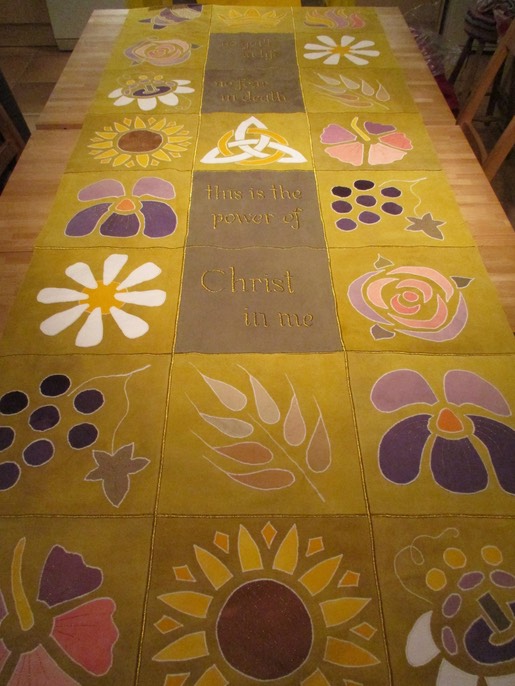

The designs are all pared down, simple images and have symbolic meanings.

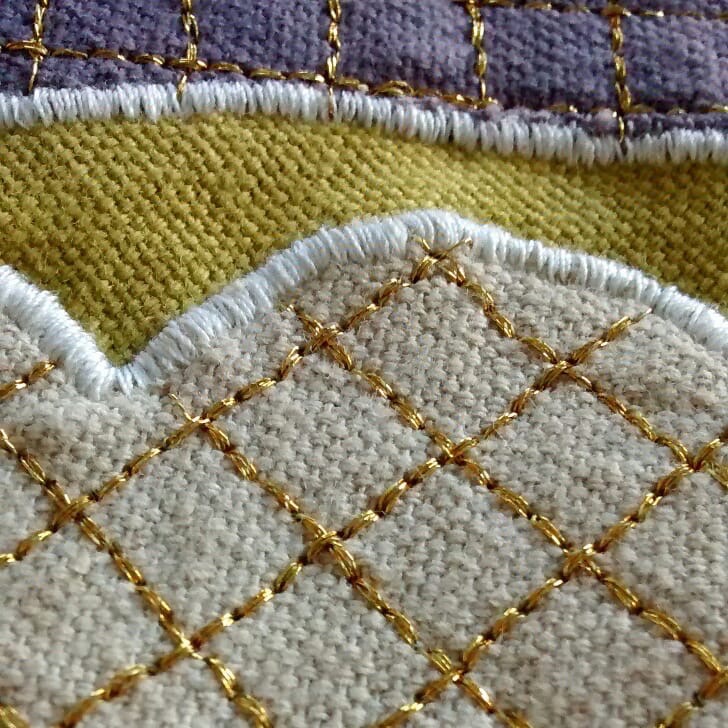
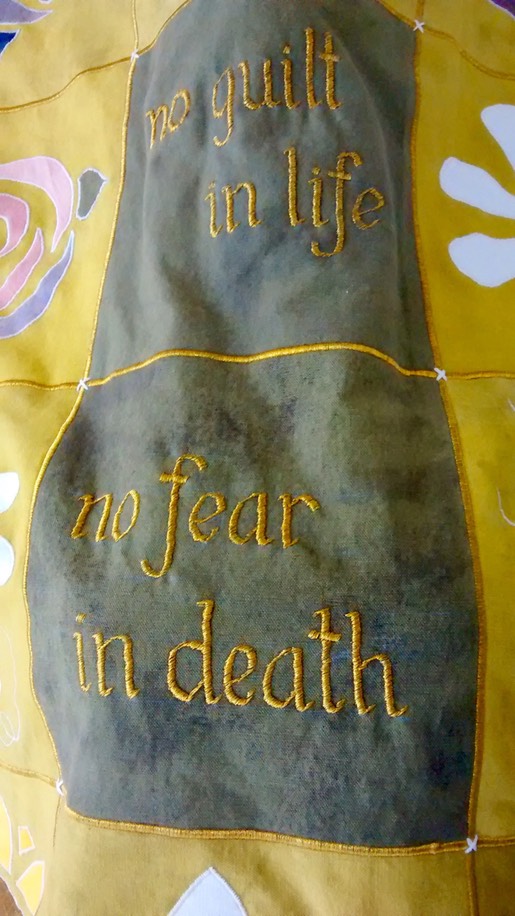
The words down the centre read: ‘No guilt in life, no fear in death, this is the power of Christ in me’ and are taken from the christian song, ‘In Christ alone’ by Keith Getty and Stuart Townend.
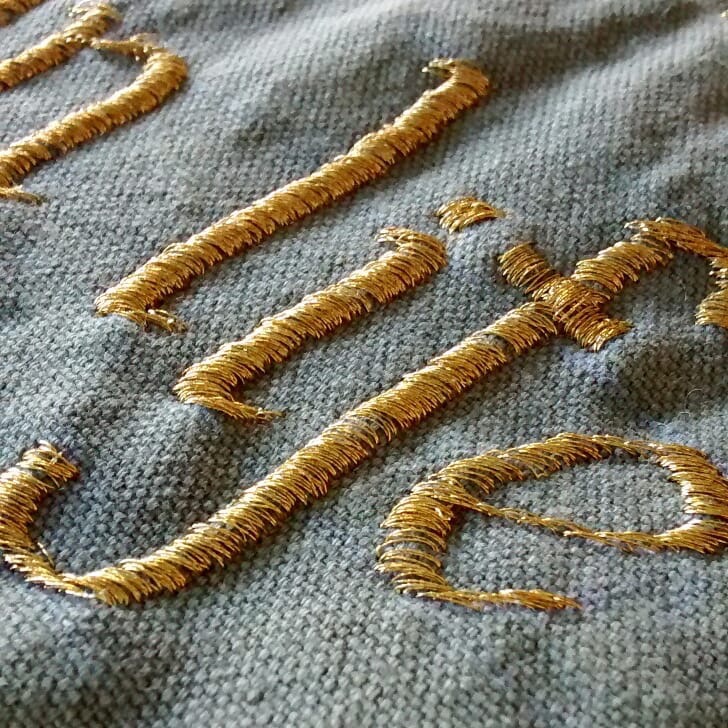
The whole sleeping bag is made from biodegradable materials (organic, ethically-made cloths and threads bought from the Organic Textile Company), and dyed with plant-derived colours (dyes from dyeing-crafts.co.uk, or grown or foraged by me) except for the gold threadwork. The idea is that everything will disappear over time, leaving no trace, no pollution, and only that which has been most important to the woman will remain. It’s an enduring witness to her faith.
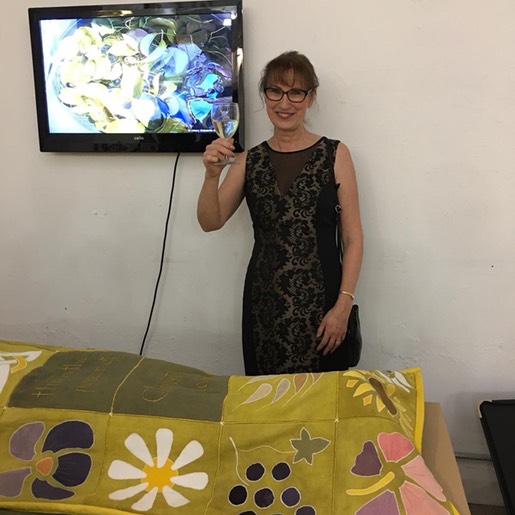
This photo was taken at my degree show...
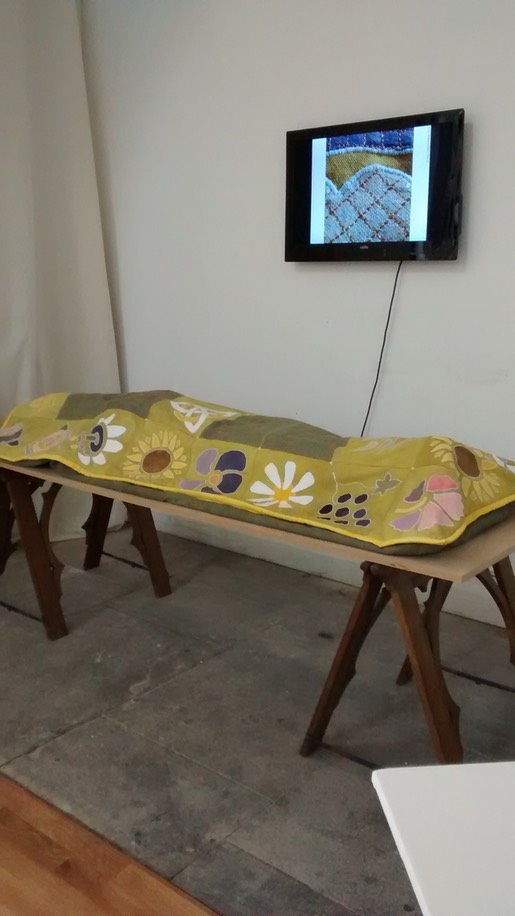
and the next is at my exhibition, ‘No Fear in Death’ which was at Christ Church, Wharton in January. A beautiful setting!
And here’s a moment of celebration after all the hard work!
In the next post I’ll tell you about the Wedding Gown.
On another note, I’ve been asked why I don’t have a comments box on my website. It’s not for want of trying! I’m looking into the technology (again) as we speak. In the meantime, please feel free to email me. My details are on the ‘Contact' page here.
xxxxxxxxxxxxxxxxxxxxxxxxxxxxxxxxxxxxxxxxxxxxxxxxxxxxxxxxxxxxxxxxxxxxxx
If you want to read my posts as I publish them, please sign up to my newsletter. It’s easy and you can unsubscribe at any time. Thanks!
Mastering the Arts!
28th January 2019
Hilary Edwards-Malam, MA! Proof that we should never rule anything out!
Last Thursday my Masters degree was conferred at Liverpool Metropolitan Cathedral of Christ the King and it was a wonderful day, closing two years of study and creative practice at Liverpool Hope University.

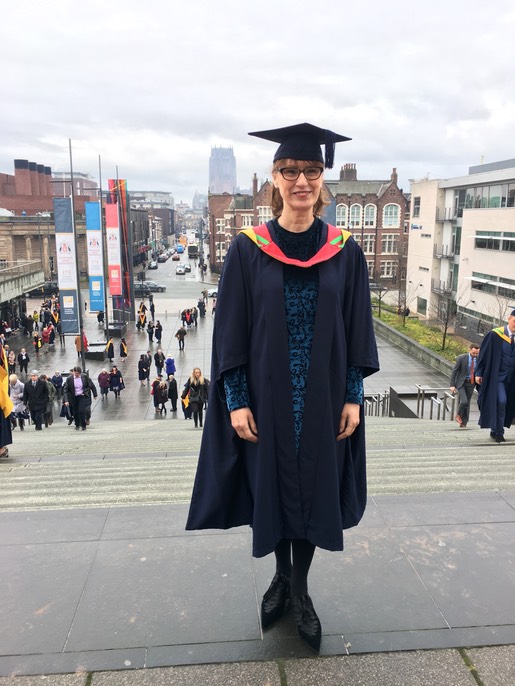
The day started early at 6.30 to catch the train to Liverpool, followed by a taxi ride to Liverpool Hope’s main campus, Hope Park, to collect our tickets and my gown. The robing took place in the Chapel and I now know my hat size is 6 5/8! The Chapel’s architecture has a flavour of the Cathedral where my graduation was to take place.

Another taxi ride took us to the Metropolitan Cathedral, affectionately known locally as Paddy’s Wigwam. It was built in the 1960s and is circular in design. The red carpet was in place and I felt a little nervous tingle of excitement on walking in.
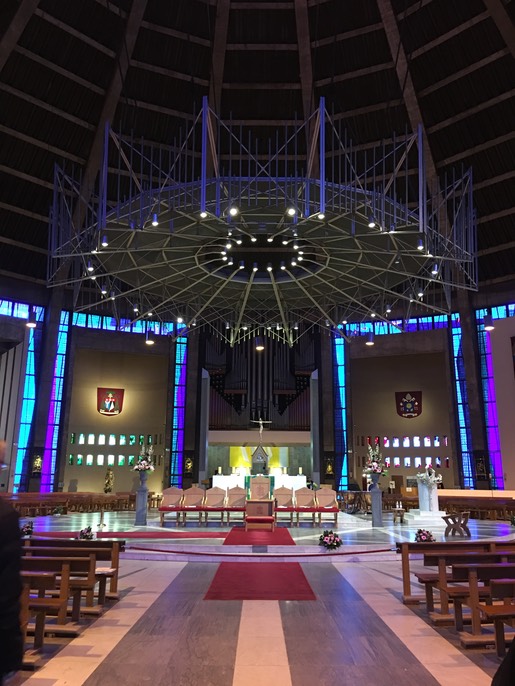
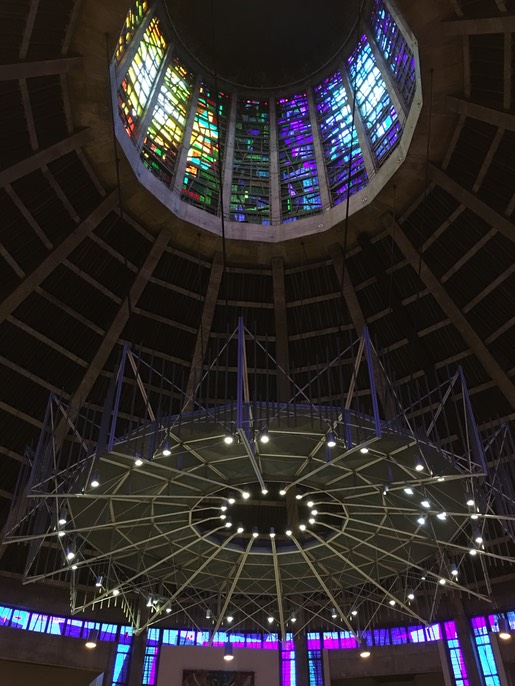
High above, the lantern tower represents a crown and the colours used in the stained glass represent the three persons of the Trinity of God. Below is another crown, a reminder of the one in the Chapel.
And this is me!
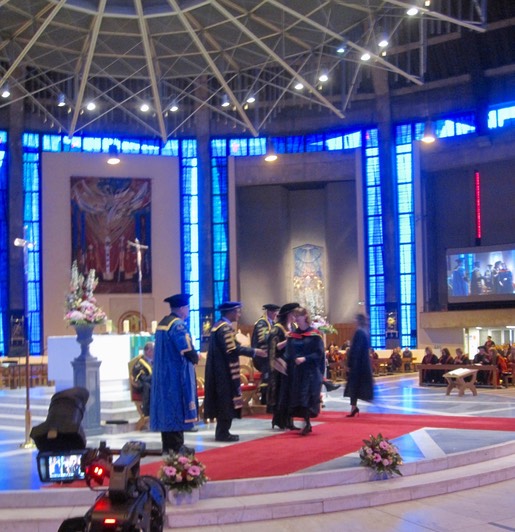
It seemed a very fitting place to hold the ceremony, in a place of worship and thanksgiving. It fitted so well with the ethos of the university and with my final pieces of work. It was a formal occasion, full of pomp and ceremony, but for all its grandeur it also felt personal and joyful.
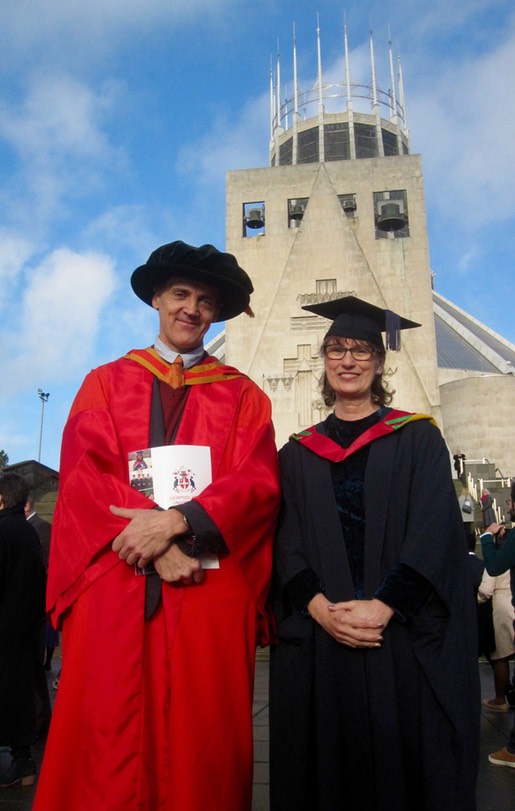
There were LOTS of photographs afterwards! They captured the essence of the day, celebrating with family, fellow MA graduates and university staff.


You could be forgiven for thinking this post is about me blowing my own trumpet, and I really am thrilled to bits that I completed the course and earned my degree. But also, I hope I can encourage others who are currently ‘considering’ or ‘mulling over’ an opportunity. What are you waiting for?!!!
Two years ago, I attended the university Open Day to “rule out” doing an MA. I thought it was something that would be beyond my reach. I thought my work might not be good enough. I thought I might not be able to express my ideas. I wasn’t even entirely sure what my ideas were. Funnily enough, I didn’t think I was too old, though I was the oldest on my course (by quite a way!).
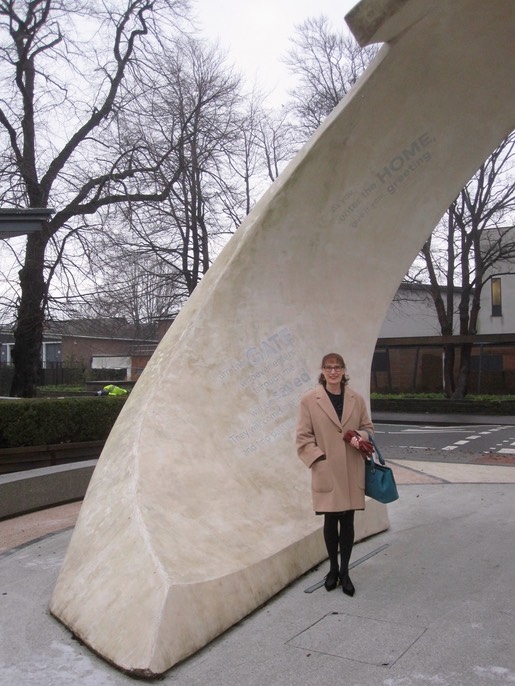
On the train to Liverpool I prayed for God to open the door if this was the right thing for me to do. Be careful what you wish for! The rest of the day saw doors being flung wide, from stepping through an archway of bible verses when I arrived at the campus, to being told, quite out of the blue, by a student. “Give your fear to the Lord!”.
The first term saw me feeling very out of my depth. The learning curve was steep and every day I discovered something new. It was exhilarating! My creative practice went through a massive series of developments and until eventually, I knew what I wanted to make for my final pieces. The outcome was way beyond what I imagined at the start!
So if you’re wondering whether to rule out doing something so you won’t be forever thinking, “What if…?” just give the door a little push. It’s the only way to know whether it will open for you or not, and you never know where it might lead!

xxxxxxxxxxxxxxxxxxxxxxxxxxxxxxxxxxxxxxxxxxxxxxxxxxxxxxxxxxxxxxxxxxxxxx
If you want to read my posts as I publish them, please sign up to my newsletter. It’s easy and you can unsubscribe at any time. Thanks!